Learning Unreal Engine 3 ¢ UE3 Editor
Skydomes and Non-Playable Space
To create a sky in an Unreal level, you need two things.
- A big open space
- A big mesh that you can paint the sky on
The first one is easy, just make your map in Additive mode, and leave a couple walls and ceilings open.
The second one is easy too, assuming you want to use a default UT3 sky.Ā Epic uses dome-shaped meshes to create the effect of clouds, a sun, and blue sky poking through.Ā ItÆs also handy to place some mountains or a city outside the playable space ¢ even if the player canÆt get to them, itÆs good to have something to break up the horizon.
In this tutorial, weÆll look at how to place one of EpicÆs skydomes and get it set up right.Ā WeÆll also look at how to detail out the non-playable space with static meshes.Ā
1) Placing a SkyDome
First, open up the map that you want to place a skydome in.Ā Then open up the Generic Browser.
Epic saved most of their skydomes in one package.Ā Go to File->Open (in the generic browser), and load
C:\Program Files\Unreal Tournament 3\UTGame\CookedPC\Environments\UN_Sky.upk
There are 12 static meshes, but 35 materials.Ā In UT3 maps, Epic reused the same basic meshes and applied different materials to them as needed.Ā (No need to duplicate geo unnecessarily.)Ā So letÆs do the same thing.Ā
Select S_UN_Sky_SM_Dome01 and place it in the scene.
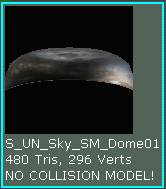
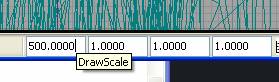
You may notice that the dome is pretty small ¢ it may not even fit over your level, and itÆs definitely obvious that itÆs just a dome as you move the camera around.Ā Select the mesh, and at the bottom of the editor window, change the DrawScale to 500.Ā
Much better, now it really feels like itÆs far away.Ā But letÆs assume you want to apply a different material to the mesh.Ā Go back to the generic browser, and hit the ōCube Primitiveö button to get a better view of your materials.Ā Skydome materials look like the ones below.Ā The lower half of the sky material is what the sky will look like along the horizon, and the upper half is roughly the view when you look straight up.

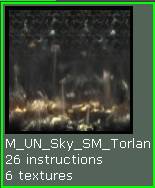
Select a material that you like.Ā Note that some of the materials are meant for special objects, like planets or star rings, and they may not work.Ā IÆm going to pick M_UN_Sky_SM_Torlan, since itÆs very obviously different from the default material on this mesh.
Now select the skydome mesh in the scene.Ā Right-click on it, select Materials->M_UN_Sky_SM_Invasion2->Assign From Generic Browser.Ā
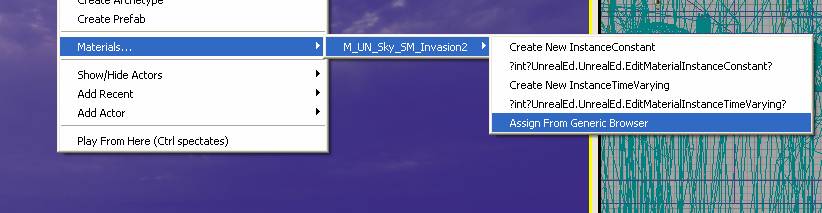
The new material will be applied to the sky mesh.
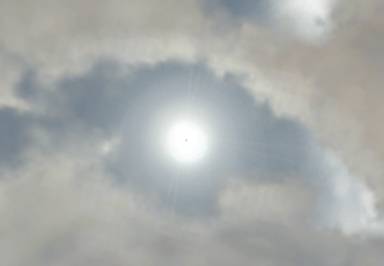
Experiment with different materials and see if you can find one that fits the theme of your level.Ā After you apply your material, be sure to look straight up at the top of the skydome.Ā You may see an effect like this:

If thatÆs the case, try applying the material to a different skydome mesh.Ā The UV coordinates may be set up a different way for the material you picked, and the material may only work with a certain mesh.
2) Proper SkyDome settings
There are a couple flags we need to check in order to get our skydome to work optimally.
Select the skydome mesh and bring up its properties (F4).
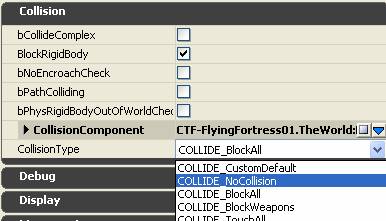
Open up the Collision category.Ā Change the CollisionType from Collide_BlockAll to Collide_NoCollision.
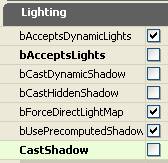
Now open up the StaticMeshActor category, then StaticMeshComponent.Ā Under the Lighting section uncheck bAcceptsLights and CastShadow.
Now your skydome is ready to go ¢ you wonÆt receive any build errors, and itÆll run at optimal performance.
3) Placing objects in the background
Of course, the sky isnÆt the only thing youÆll want outside of your playable space.Ā You may want a distant city, or rocky cliffs, or an oceanģ or any combination of those.Ā
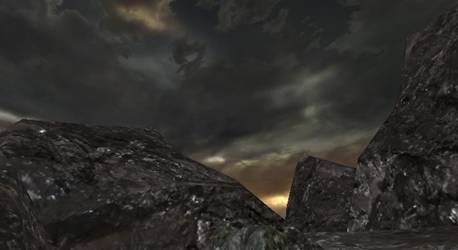
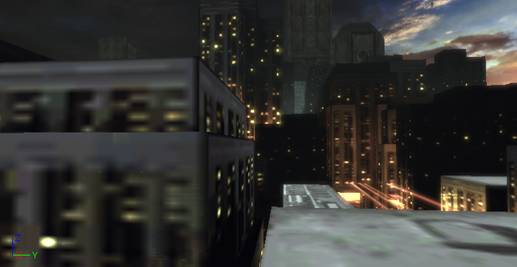
Any static mesh can be used in the background.Ā ItÆs nothing special, just a prop you canÆt get to.Ā If you look at any UT3 map, youÆll notice a combination of techniques ¢ rocky cliffs are often standard rock meshes, scaled up much larger than normal.Ā Buildings may be built with the same components of your playable space.Ā But there are also plenty of meshes designed specifically to be seen in the background.Ā For instance, these buildings look blurry up close, but theyÆre fine farther away.
The best way to learn what makes a good background is to dissect Unreal maps, and figure out how the artists at Epic put them together.
But there are a couple general pointers you can follow.
- Try to hide the horizon.Ā If you have height fog in your map, that may help with this.Ā Otherwise, put some tall objects that block most of the playerÆs view just outside the playable space.
- You donÆt need to fill out the entire background space.Ā Only pay attention to what the player will see, or youÆll be wasting memory and framerate.Ā (DonÆt build out the ground if the player can only see the rooftops.)
- DonÆt go overboard with the number of objects you place.Ā Too many objects or too many polygons will kill framerate.Ā (Stay in the range of 200-400 objects outside the playable space.)
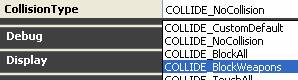
- Optimize your background assets by turning off collision on them.Ā As we saw on the skydome mesh, set them to COLLIDE_NoCollision or if theyÆre close enough to shoot at, choose COLLIDE_BlockWeapons.Ā If you have multiple objects selected, you can change properties on all of them at the same time.
4) Copying background objects from another map
A great way to start detailing out your background is to cheat ¢ find an Unreal level that has a similar theme, select their background assets, and copy/paste them into your level.Ā You can then move the assets around as needed.
Some of the UT3 maps can be found in here:
C:\Program
Files\Unreal Tournament 3\UTGame\CookedPC\Maps
And the rest in here:
C:\Program Files\Unreal Tournament 3\UTGame\CookedPC\Private\Maps
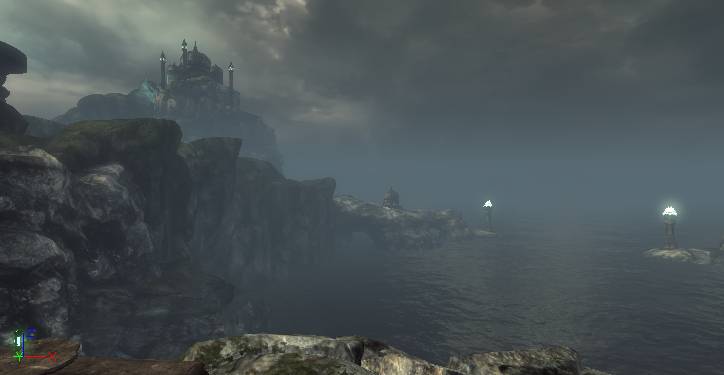
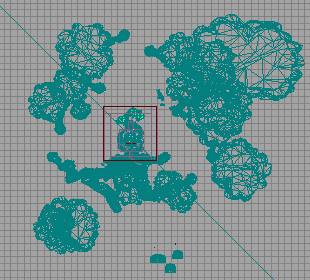
LetÆs copy some background assets now.Ā Go to File->Open, browse to the first folder, and open DM-Sanctuary.Ā Move the camera around the playable space a bit.Ā YouÆll notice a skydome like the one we placed, a big water plane underneath, and a bunch of rock formations that lead off into the distance.Ā
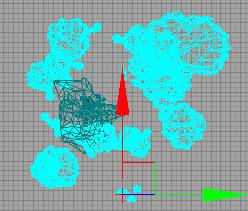
What we want to do is copy the rock formations into our own map.Ā If you zoom out in the top view, youÆll see the playable space in the middle (mostly surrounded by a red box), and large-scale mountains surrounding it.
Before you copy anything, youÆll need to hide some object types, since really all we want to copy is static meshes.
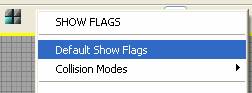
In the top view, hit the Toggle Show Flags button (the little black down-arrow).
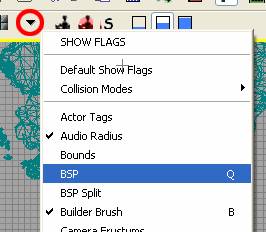
Turn off the following flags:
- BSP
- Decals
- Sprites
- Volumes
That will simplify whatÆs shown in the scene.
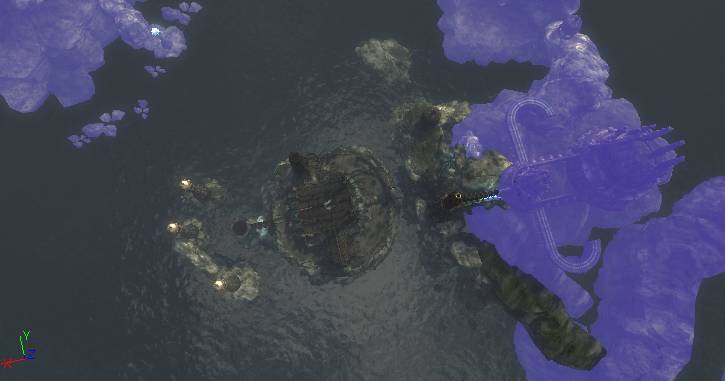
Now you can start selecting objects.Ā You can create a drag selection by ctrl-alt-dragging in the view.Ā (You can deselect by ctrl-alt-dragging with the right mouse button.)Ā You can also ctrl-click on an object to toggle its selection.
Select all of the meshes outside the playable space.Ā (You can drag-select the whole scene, then drag-deselect objects in the playable space, and all thatÆs left selected will be objects outside the playable space.)
At the bottom of the editor window, thereÆs a block of text that will tell you how many objects youÆve selected.Ā Use this to sanity check your selection ¢ If youÆre in the range of 200-300 objects, youÆre fine.
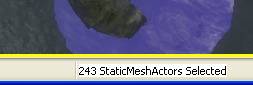
If it says ō243 Actors Selectedö instead of ō243 StaticMeshActors Selectedö, then youÆve got multiple actor types selected, which may mean you need to double-check the Toggle Show Flags menu to make sure everything is turned off properly.

When youÆre done selecting, go to Edit->Copy (or hit Ctrl-C.)Ā Then load up your map and paste (Edit->Paste or Ctrl-V.)
The props now show up in your level, and you can move, duplicate, or rearrange them however you need to!
To wrap things up, youÆll probably also want to go back to the Show Flags menu in your top view and reset to Default Show Flags.Ā This will turn back on everything you turned off.