Basic Asteroid Shape
|
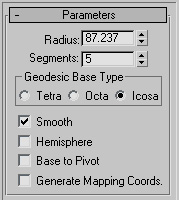
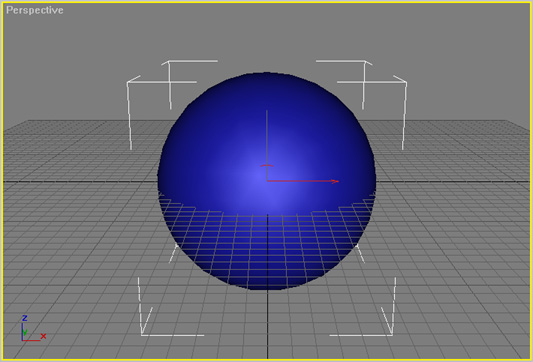
1) Start with a geosphere. Give it a radius somewhere between 80 and 90, and 5 segments. (The radius isn't important, except that it works better with the example values I give throughout this tutorial. I gave it five segments because I liked the polygon count this resulted in.)
|
|
|
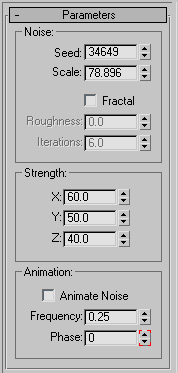
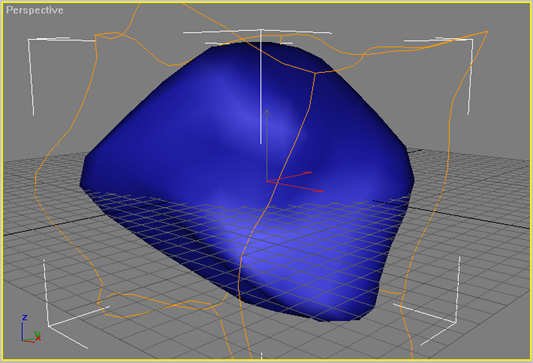
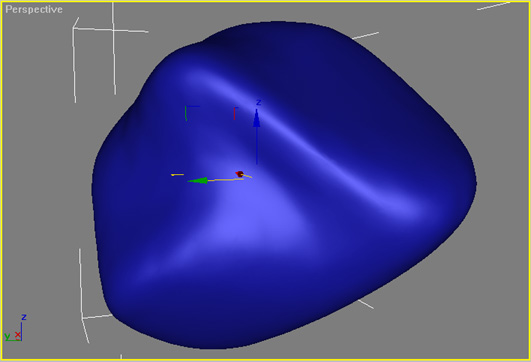
2) Add a "Noise" modifier. This gives the asteroid its basic shape. Type in a scale of about 80 and strength values of 60, 50, and 40 for the X, Y, and Z strengths, respectively. Now play with the seed value until you find a shape you like. (Putting in different values for the X, Y, and Z scales gives the asteroid a somewhat less uniform shape. The numbers I picked just happened to work well for me, but play with them a bit if you don't like the results they give.)
|
|
|
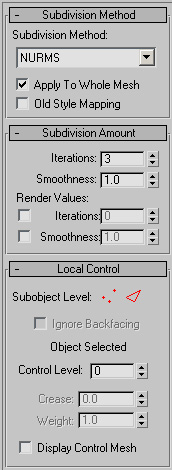
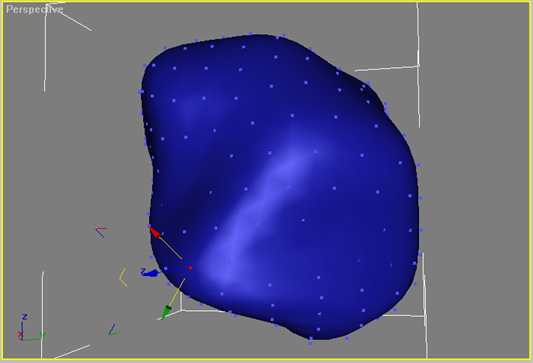
3) Add a meshsmooth modifier. This will smooth out the mesh, give you more polygons to work with, and allow you to further shape the mesh if you want to. Set the "Iterations" value to 3, and you're on your way! (Setting "Iterations" higher or lower will give you more or less polygons to work with.)
|
|
|
Advanced
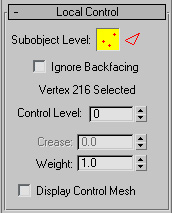
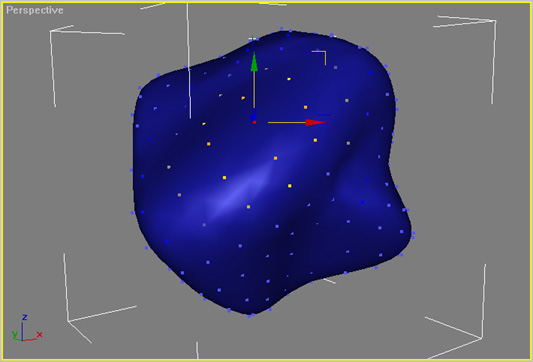
If you want more control of your mesh: In the "Local Control" section, click on the "vertex" icon just to the right of where it says "Subobject Level". This will display a bunch of control points across the mesh, which you can move around to warp the geometry. Be sure to play around with Soft Selection a bit, since it can really speed up your modeling.
|
|
|
Also, note that with the noise modifier, the mesh will be more or less symmetric across one axis. You'll want to manually adjust control points to make this look better.
|
|
|
4) You're done with the basic shape of your asteroid! Now it's time to add some details...
|
www.waylon-art.com
|