|
Deep Paint 3D can be an incredibly useful tool to aid in texture mapping your object. (They have a free trial period, too. You can download the program here.) Most people I know use Photoshop for painting texture maps, but it can get difficult detailing every little surface of an object, especially if it's chopped up into a puzzle like my space ship is. :) And even if you don't use Deep Paint for most of your painting, it's great for removing seams between mapping elements.
|
|
Deep Paint's main purpose is to allow you to paint directly onto the surface of your object, totally independent of UVW mapping coordinates. You can either use the paintbursh tools in Deep Paint, or render a still shot of the object and paint on it in Photoshop. When you're all done, you can send the texture back into Max. This means you don't have to be nearly as precise when setting up mapping coordinates - a simple "Flatten Mapping" will almost always suffice.
|
|
I'm not partial to Deep Paint's paintbrush tools, so I'll walk you through exporting to and from photoshop. First, in Max, I'll apply a new material with a rough-looking texture map to the ship, just as a starting point. (We're not going to do a real detailed texture here, I'm just going through the motions.)
|

|
|
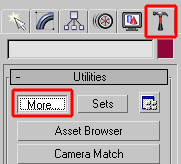
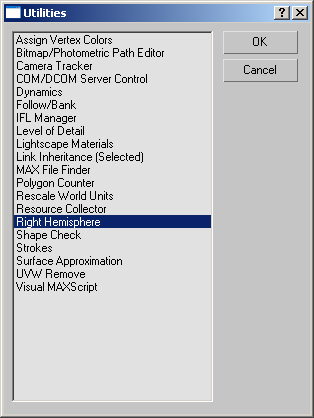
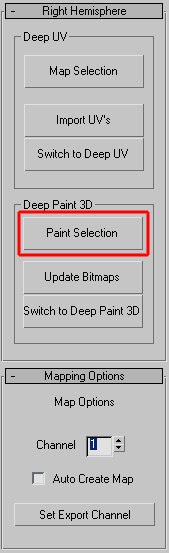
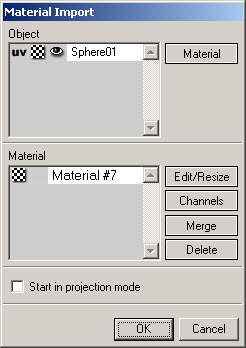
If you've installed Deep Paint correctly, you'll find a "Right Hemisphere" listing under your Utilities tab - click "More" to find it. Double-click on it, then click on the button labeled "Paint Selection" - that'll load up Deep Paint, and send the object and materials over to it. You'll see a "Material Import" dialog - hit OK.
|
|
|
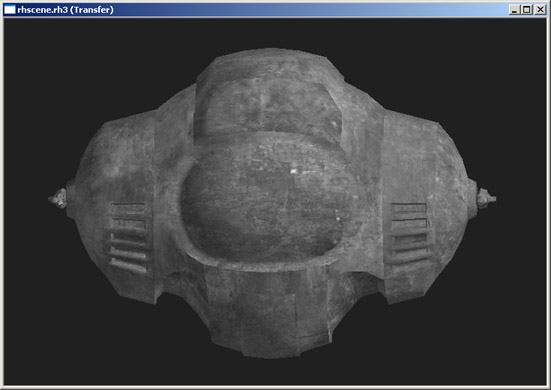
Your object should be loaded, texture and everything. In the toolbar is a Rotate tool. This is essential, but pretty self-explanatory. The zoom tool is handy too if you're going to be doing any detail work. So rotate and zoom your object around until you find an angle you'd like to paint from.
|

|
|
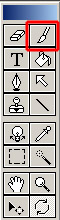
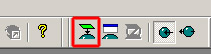
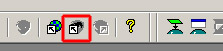
Click on the brush tool. (it's just an odd effect of the interface that you can't export unless you have a painting tool selected.) Next, up at the top of the screen, click on the "Toggle Projection Mode" button - this lets the program know you want to paint directly on the mesh. Then just to the left of that, click on the "Export Material to Photoshop" button. If it's not already running, Photoshop will load up, and your texture will appear. (Depending on your operating system, you may get a "Server Busy" error message hidden under the photoshop window - just click on "Switch To" to continue.)
|
|
|
Once the texture is loaded, you're pretty much ready to paint on it. If you look at your layers palette you'll notice a lot of layers. The top one shows the geometry of the object - hide and unhide that as you need it. Under that is a layer labeled "Paint layer: Color". Do all of your painting there. When you switch back to Deep Paint, it'll take whatever's in that layer and apply it to the mesh. To be honest, I haven't experimented much with the other layers (bump, glow, etc) but they shouldn't be too hard to figure out if you need them.
|

|
|
One other useful note, if you want to rubber stamp something from the reference layer to the paint layer, check "Use All Layers" in the stamp tool's properties - this will keep you from having to change layers every time you want to set a different clone source.
|

|
|
Once you're done adding details, switch back to deep paint, and click on "Fetch the Material from Photoshop". (Click "Yes" when it warns you that the operation will not be undoable.) If you switch back to the rotate tool, you'll be able to see your new details applied to the object.
|


|
|
Go back and forth as often as you need to, rotating the object and drawing more details. When you're all done, you'll want to send the material back to Max (this saves the texture map back out to the original texture file - so be careful, if your file was a psd, it'll overwrite all your layers!) To get the material back into Max, get out of projection mode by clicking the same button as before, then click on the "Send Materials to 3D application" button. In Max, your texture should load automatically.
|
)
)
)
)
)
)
)
)
)