Learning Unreal Engine 3 ľ UE3 Editor
Editor Basics Topic 1 ľ Basic Navigation
The best way to learn UnrealEd (and most tools in general)
is to dig in and see how other people have used it ľ so weĺll start by loading
one of Epicĺs maps.
Note: The file paths listed
here are for Windows XP ľ Iĺm told things are a little different in
1) Load the Editor
Start->Programs->Unreal Tournament 3->Unreal Tournament 3 Editor
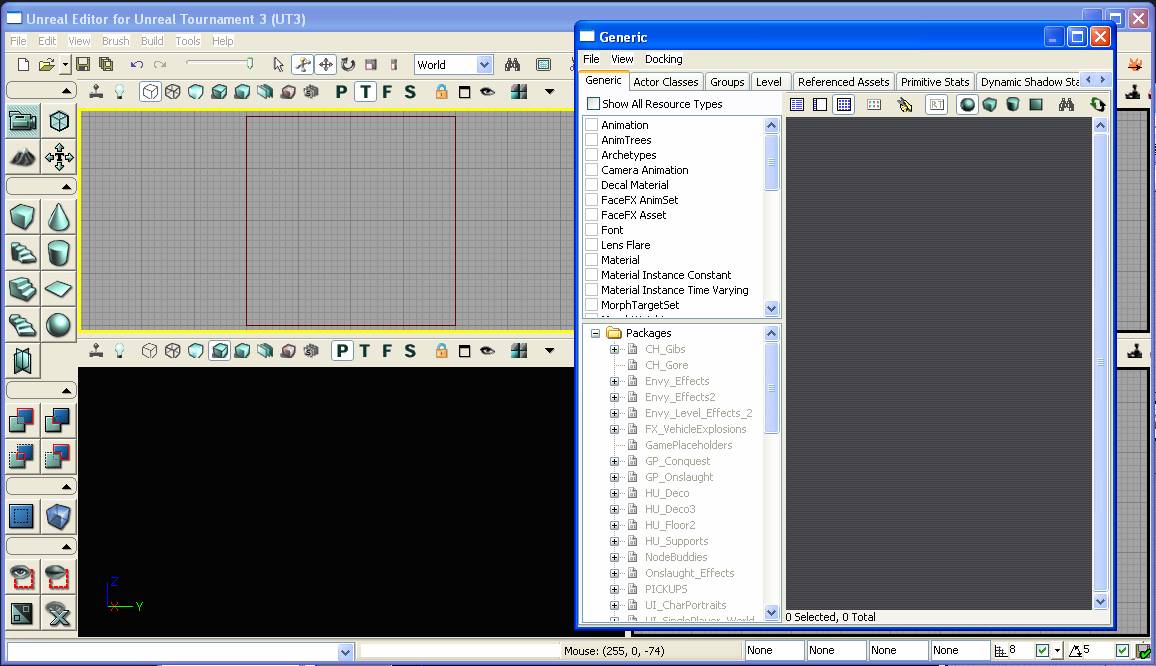
Yay, the editor loads!á
Youĺll notice two windows ľ the Generic Browser, and the main editor
window with four quadrants.á Close the
ôGenericö window for now, weĺll get back to that later.á Whatĺs left is the main editor window.á This is where we assemble our maps.á
2) Load a Map
So letĺs load one of the Unreal Tournament maps.á Go to File-Open, browse to C:\Program Files\Unreal Tournament 3\UTGame\CookedPC\Maps, and open one of the map files, say, DM-HeatRay.ut3.
(Note: lots of other maps can
be found in C:\Program Files\Unreal
Tournament 3\UTGame\CookedPC\Private\Maps)
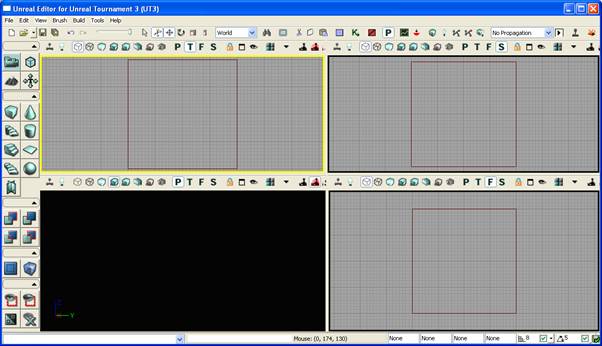
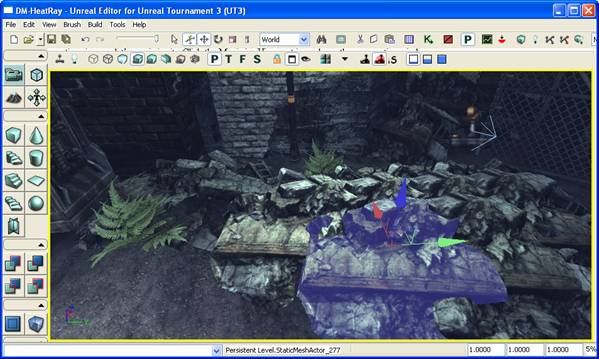
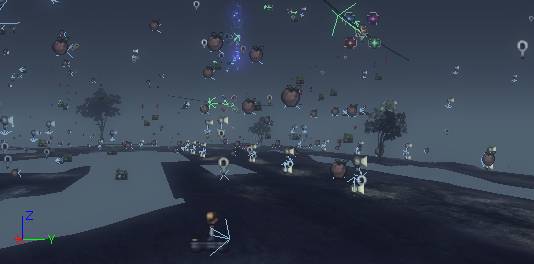
You should see something that looks like this.
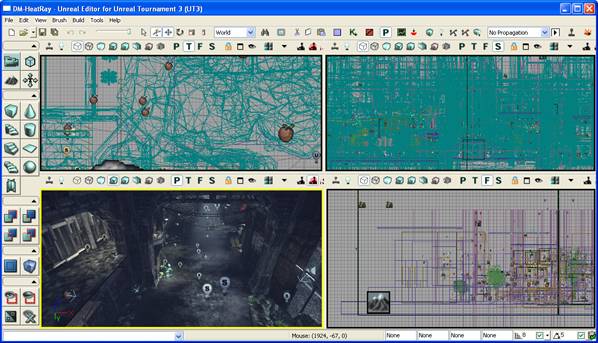
In the bottom-left is the 3D Perspective viewport, and the
other three views are Top, Front, and Side orthographic views.á
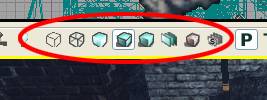
You can change rendering modes of the viewports by clicking these buttons.á (Mouse-over them for tooltips on what they do.)á Youĺll normally work in Unlit mode in the Perspective viewport, since itĺs fastest, but Lit mode is important too.á Wireframe is usually best for the orthographic viewports.á Other view modes are useful for performance testing and polish, so obviously you wonĺt need those now.
Also, you can change the view that appears in each window ľ Perspective, Top, Front, Side.

3) Learn to Navigate
Navigation is all controlled through the mouse, and itĺs
different in the ortho vs perspective views.
Orthographic:
Left mouse button scrolls around.
Scroll wheel zooms in and out
Holding both left and right mouse buttons zooms in an out
too, and itĺs a little easier to use.
Perspective:
Left mouse button is ôwalkö mode ľ it lets you move forward and backward, and look left and right, but the camera always stays at the same height no matter where youĺre looking.á Great for flying through a game level!
Right mouse button is ôlookö mode ľ it just swivels around the current position without moving.
Holding both mouse buttons is ôstrafeö mode ľ this is the best way to move up and down, and also side to side.
Scroll wheel zooms forward and backwardá ľ but I never really use it!
4) Selecting, Moving, Rotating, and Scaling objects
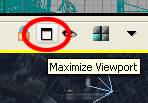
For now weĺll be working purely in the Perspective view, so letĺs maximize it.á Click the Maximize Viewport icon above the perspective window.
Clicking on stuff selects it just like youĺd expect.á Try to find a rubble pile and select it.á Theyĺre all over, it shouldnĺt be too tough to find one.

Notice the three arrows that appear in the middle.á Thatĺs the move tool.á Click and drag on one of the arrows, and
youĺll see the rubble pile move around.á
Neat!á
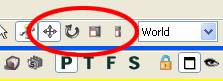
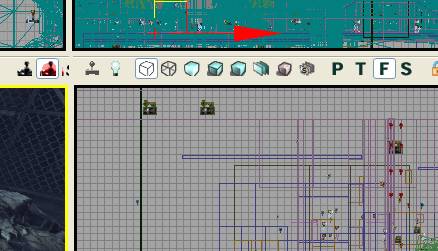
You can also rotate the object and scale it by changing between transform modes.á Click on the icon like Iĺve circled below, or press space bar to cycle between modes.á Try it out!á Also see that drop-down box labeled ôWorldö?á You can change it to ôLocalö, which means the object will move around its local axis instead of the world.á Again, just try it, youĺll understand if you play with it.
You can make a new rubble mound by copying and pasting it (ctrl-c ctrl-v), or by alt-dragging on one of the move tool handles.á Give it a try ľ look, I made a whole bunch!
Some other useful stuff ľ
Pressing the ôHomeö key will center all of your viewports around the selected object
If your object is floating, pressing the ôEndö key will drop it to the ground.
5) Other stuff in the world
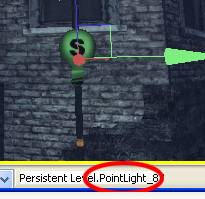
So aside from props, there are lots of other icons floating around ľ light bulbs, apples, joysticks, etc.á These represent game objects ľ things that donĺt appear directly, but that are necessary for gameplay.á Briefly, light bulbs represent lights (duh), apples represent path markers that bots use to navigate, and joysticks represent player starting positions. There are some other icon types too ľ if youĺre curious what something is, select it, and its name will appear at the bottom of the window.á You can see here I selected a point light.á In the screenshot above, as you already know, weĺve got a StaticMeshActor.
Oh, and some terminology ľ ôActorö refers to anything you
can place in the game world.á
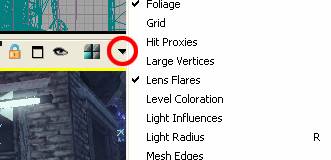
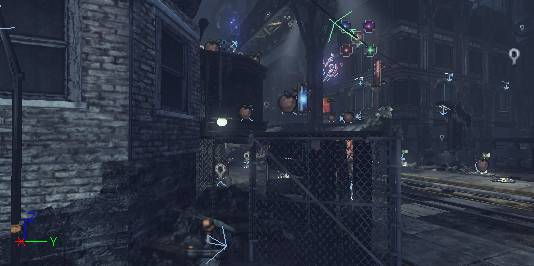
Now, itĺs sometimes useful to show and hide different types of objects in the world.á The little black arrow opens a list of whatĺs currently visible.á Try clicking on ôStatic Meshesö (or pressing the shortcut key, ôwö.)á
The world goes from thisů
To thisů
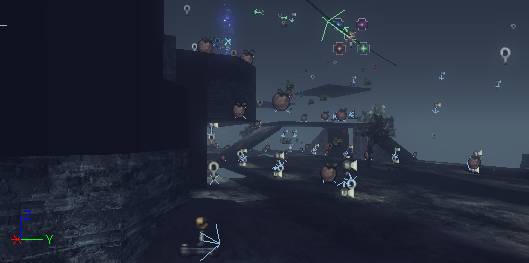
Note that the world isnĺt completely empty.á There are a lot of big chunky surfaces still
floating around, making up a lot of the floors and some of the walls.á This is BSP
geometry.á Weĺve got a whole chapter on
BSP coming up, but generally speaking, itĺs geometry thatĺs modeled inside
unreal.á Itĺs expensive, and the tools
are kind of clunky, so youĺre better off using static meshes for lots of the
detail.á But itĺs great for prototyping
the layout of a level when you first begin working on it, and itĺs still pretty
useful for some simple stuff in the final level (as we can see above.)
If I turn off BSP (press Q), we see thereĺs still geo left!á There are some trees, which are SpeedTree actors, and some ground, which is Terrain.á More detail on all that later.
Be sure to turn StaticMeshes and BSP back on and letĺs continue!
6) Snapping and the Grid
You may have noticed that when you move, rotate, and scale,
the object tends to jump around a little ľ the movement isnĺt totally
smooth.á Thatĺs because Unreal is trying
to keep the object on the grid.á This is
a good thing!á Hit that ôMaximize
Viewportö icon again to get our orthographic views back and letĺs look at what
that means.
Unreal uses a power-of-two grid.á That means that gridline spacing can be set
to 1, 2, 4, 8, 16, 32, 64, 128, 256, 512, or 1024.á What do those numbers have in common?á Each one is twice is big as the previous
one.á
Whatĺs cool about it?á
Lots of props in Unreal are built to one of those sizes.á Say a railing is 256 units long, and you set
your grid to snap to 256 units.á That
makes it really easy to clone a whole bunch of railing segments and get them to
all line up perfectly.á So yes, you may
feel like youĺve got more fine control if you turn the grid off, but ultimately
itĺs a lot easier to build with the grid on, and set as large as you can mange.
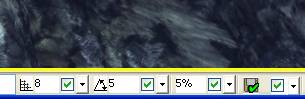
Grid settings are in the bottom-right corner, and you can also change the grid size using the bracket [ ] keys.á You can also change snap settings for rotating and scaling ľ and again, itĺs easier to get everything to line up if you leave snapping on.