Learning Unreal Engine 3 ¢ UE3 Editor
Editor Basics Topic 3 ¢ Your First Level (Part 1)
In this section weÆll build our first level using UnrealÆs in-editor modeling system, CSG (short for Constructive Solid Geometry. Also referred to as BSP geo.)
1) Setup, where to save the file, what to name it
Go to File->New.Ā A window will pop up asking what geometry style you want ¢ select Additive.Ā (Not only is it more appropriate for most level designs, IÆve also seen some weird bugs with Subtractive mode in UE3) Ā
Before we begin working, letÆs pick a name and save our file.Ā For purposes of this test, weÆll use ōDM-CSGTest01ö.Ā Unreal figures out what game type youÆre making based on the map name, so by choosing ōDM-ō, weÆll get a Deathmatch map, and all of the associated gameplay that comes with it (like default loadout.)Ā Go to File->Save.Ā Unreal works best if you put your map in a specific folder (which you may have to create) ¢ My Documents\My Games\Unreal Tournament 3\UTGame\Unpublished\CookedPC\CustomMaps.Ā (And name it DM-CSGTest01.ut3)
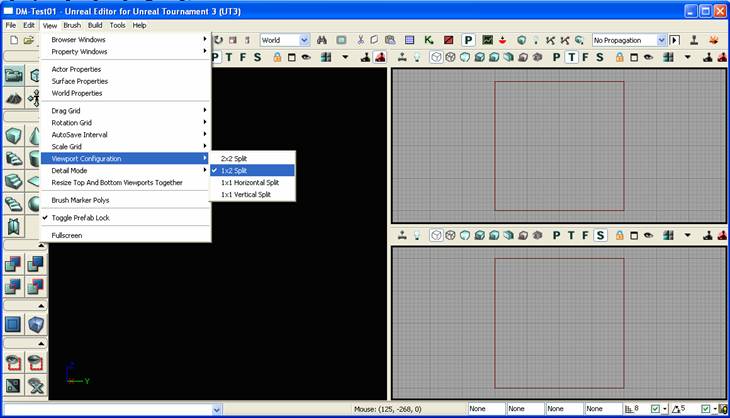
LetÆs also do some viewport
configuration to make editing easier.Ā Click on View->Viewport
Configuration->1x2
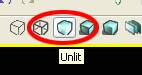
Click on ōUnlitö mode in your perspective view.Ā Since weÆre building a level from scratch, there wonÆt be any lights yet, so we need to be in unlit mode to see what weÆre doing.
2) Why CSG?
WeÆre going to use CSG geometry to rough out our level.Ā ItÆs the in-editor 3D modeling tool.Ā While you could rough out the level in a 3D application like Maya, Max, or even AutoCad, CSG gives you an incredibly fast turnaround when you begin working out the gameplay of your level.Ā Corridor too long?Ā Just grab the adjacent rooms and move them closer.Ā ItÆs much easier than going back and forth between different software packages.
That said, CSG isnÆt good for anything very detailed.Ā ItÆs expensive, itÆs hard to work with, and itÆs prone to errors if the geometry gets too complicated.Ā For that reason, itÆs great for prototyping since you donÆt WANT to add much detail in the early stages.Ā ItÆs also suitable for some simple geometry in the final level, as you can see in some of EpicÆs maps.
3) The Builder Brush and our first cube
At the center of your empty level is a red wireframe cube.Ā This is the Builder Brush.Ā Think of it as a rubber stamp.Ā Whatever shape and size it is, thatÆs the shape and size of the geometry that youÆre going to stamp down.
Select the builder brush, then click on the CSG: Add button.Ā
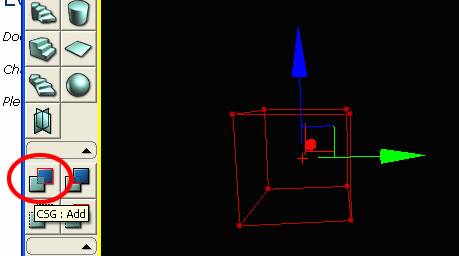
This stamps a cube down into the world.Ā
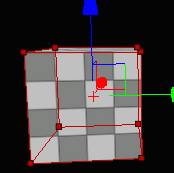
If you move the builder brush out of the way, you see that the cube stays ¢ in the 2D views, it appears as a blue wireframe box.
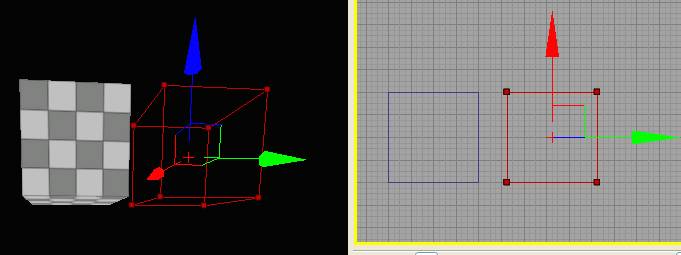
Now select the blue additive brush (in one of the 2D views) and move it to the side.Ā
What gives?!Ā The checkerboard cube didnÆt move with it!Ā When you modify existing CSG geo, Unreal requires you to ōRebuild Geoö ¢ for a simple cube move this is plenty fast, but when youÆve got a whole level roughed out in CSG, you wouldnÆt want Unreal to pause and recalculate all the time.
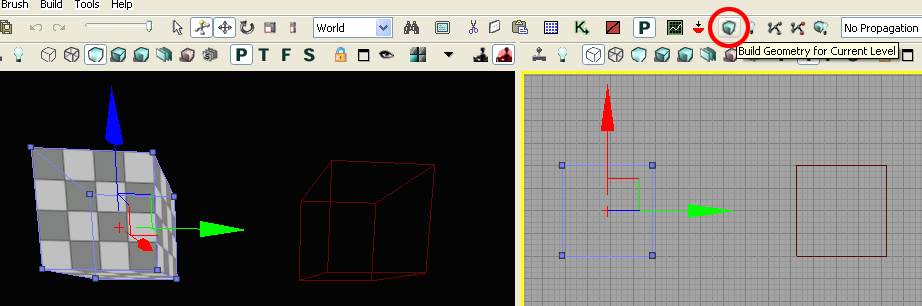
Click on ōBuild Geometry for Current Levelö, toward the top-right of the screen.Ā YouÆll get some warnings (which are no big deal, and weÆll discuss later) but the cube appears where it should.Ā Yay!
4) Subtractive geo
So say you wanted to create a room.Ā You could place six additive cubes making up the walls, floor, and ceiling, but thereÆs a better way to do it.Ā In addition to Additive geo, Unreal has Subtractive geo, and it does just what youÆd think ¢ it carves a hole in additive geo.
Select the builder brush, move it so that itÆs partially intersecting with your additive brush, and click ōCSG: Subtractö.

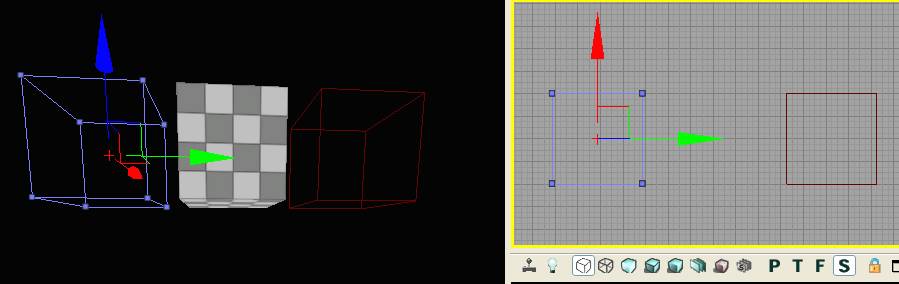
If you move the builder brush out of the way, youÆll see that thereÆs now a chunk taken out of your cube, and thereÆs a yellow subtractive cube in the 2D views.
Try moving the subtractive brush around.Ā Again, you need to Rebuild Geometry in order for the changes to update in the 3D view.Ā
Also, you can clone your additive or subtractive brushes by copying and pasting them (ctrl-c ctrl-v), or by alt-dragging one of the movement handles.Ā Play around a little more, intersect some more shapes, and rebuild.Ā Get a feeling for the tools.
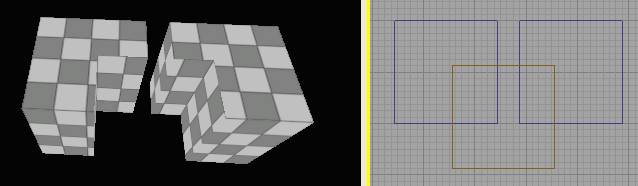
5) Brush Order
You may notice that sometimes a subtractive brush cuts into one additive brush but not another.Ā
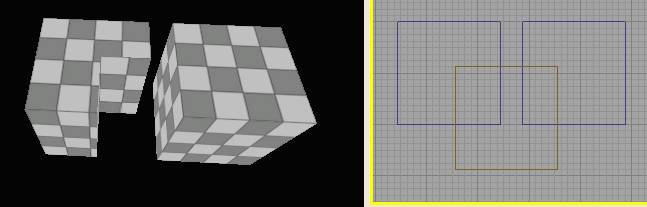
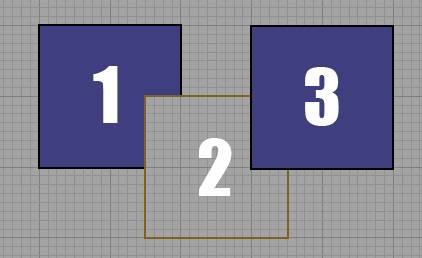
This is because brushes are order dependent ¢ theyÆre like a set of commands.Ā ōBuild this!öĀ ōNow cut into it!öĀ ōNow build on top of that!öĀ Kind of like in the diagram below.
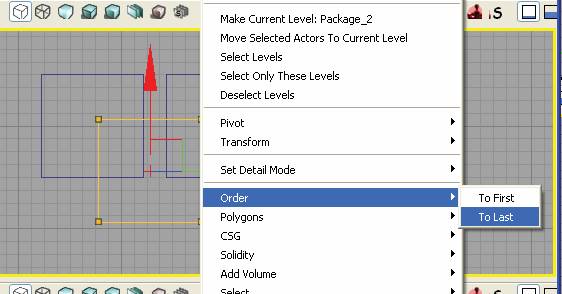
If we want the subtractive brush to cut into both additive brushes, we can make it the last command in the list.Ā Select the subtractive brush, right-click on it, and select Order->To Last.
Now the brushes are in the order we wantģ
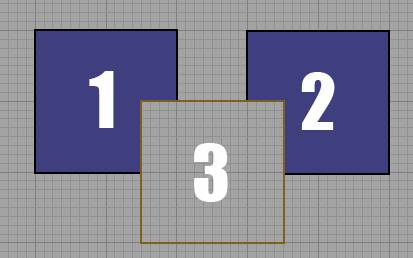
And if we rebuild geometry, we get the results we want.Ā
And yes, you could have also selected the #3 additive brush and clicked on Order->To First to get the same result.
6) Geometry Editing mode
LetÆs face it, it would be tough to build a level solely out of cubes.Ā LetÆs look at some more advanced geometry editing.Ā But first, save your work, create a new file, and save it as DM-CSGTest02.upk.Ā
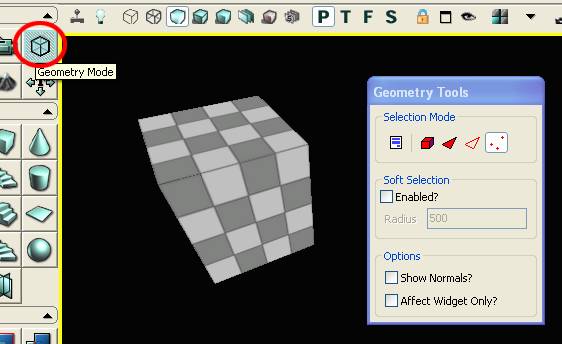
Create a new additive brush then click on the ōGeometry Modeö button at the top-left corner of the window.Ā This opens up the ōGeometry Toolsö dialog box.Ā (You can close it again by clicking on the button to the left, ōCamera Modeö.)
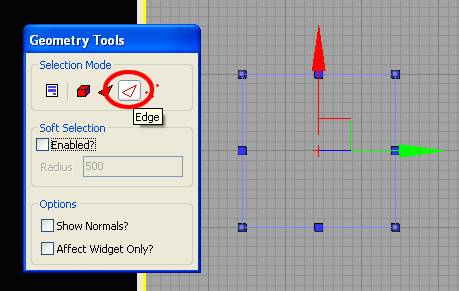
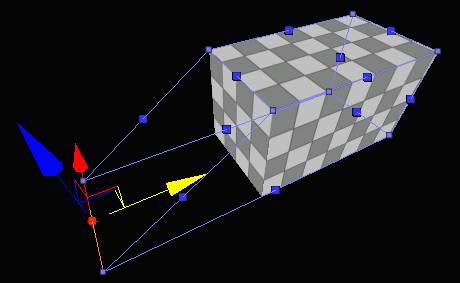
Working with edges is the easiest way to get started, so click on the ōEdgeö button, and select your additive cube.Ā
Make sure youÆre in ōWorldö mode (not Local)ģ

Then select and edge and try moving it around.
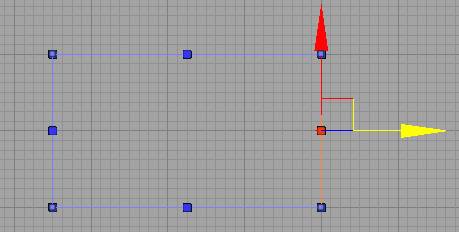
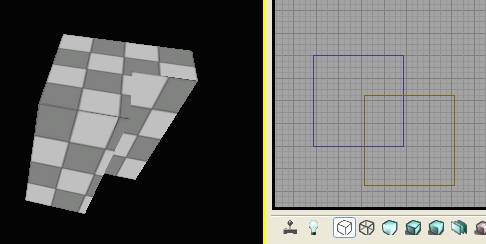
Now our cube is an elongated rectangular box.Ā (DonÆt forget to rebuild geometry.)
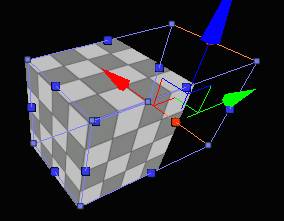
YouÆll notice that when you selected the edge in the 2D view, it actually selected two edges in the 3D view (in my case, the top and bottom.)Ā This is really handy, and what you want most of the time.Ā But you can also make a ramp shape by selecting only one of the edges in the 3D view and then moving it.
Editing vertices is also pretty powerful.Ā Switch back to Vertex modeģ
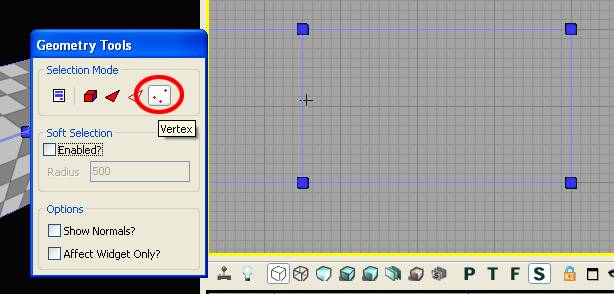
And you can select any vertex and move it around.Ā You can also ctrl-click to select multiple vertices, or ctrl-alt click and drag to make a selection box.Ā
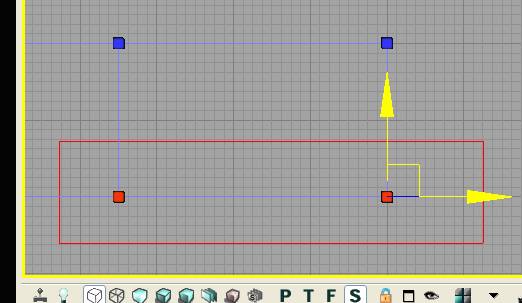
Note that ctrl-alt-dragging works for anything in Unreal, not just geometry editing.Ā (And you can ctrl-alt-rightclick-drag to deselect.)
Play with your shape some more, and get a sense for how to do some serious geometry editing!
8) Building our first room
Time to create our first room ¢ something we can actually run around in!Ā Save your work, create a new file, and save it as DM-CSGTest03.upk.Ā
We want our room to be big enough for the player to run around in.Ā The builder brush is 256x256x256 by default, and the player is 88 units tall.Ā ThatÆs going to feel a little cramped, so letÆs make our cube more like 1024x1024 and 512 units tall.Ā What weÆre going to do is create an additive cube thatÆs the size we want, then hollow it out by using a slightly smaller subtractive cube.
Select the builder brush and make sure youÆre in geometry mode.Ā (Yes, the geometry editing tools work on the builder brush too.)Ā Also, resize your grid to 32 units (either by using the controls in the bottom-right corner of the screen, or the bracket [ ] keys.)Ā ItÆs important to build on the grid so that we have an easier time judging size, and so that when we expand our level later everything lines up nicely.Ā (This is also why weÆre using the geometry tools to resize the brush instead of non-uniform scaling it.)
Your setup should look something like this.

So weÆre going to grab the builder brushÆs edges and move them around until the brush is big enough ¢ but how do we tell how big it is?Ā ThereÆs nothing that tells us the cubeÆs size directly.Ā We can use the measure tool to drag in a 2D view and measure distances.Ā Just click and drag with the middle mouse button.Ā
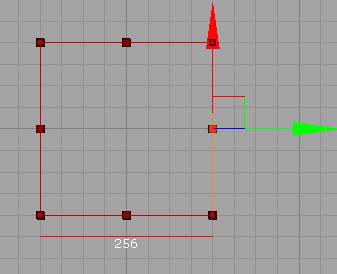
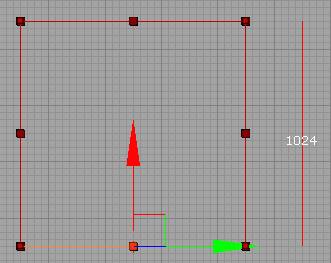
Drag the builder brushÆs edges until itÆs the right size.Ā Make sure you also check the side view, and make the brush 512 units tall.
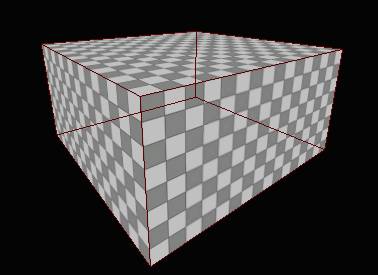
Click CSG:Add, and your box will appear in the 3D view.Ā Note that the checkerboard on the surface tiles a lot more on a bigger cube.
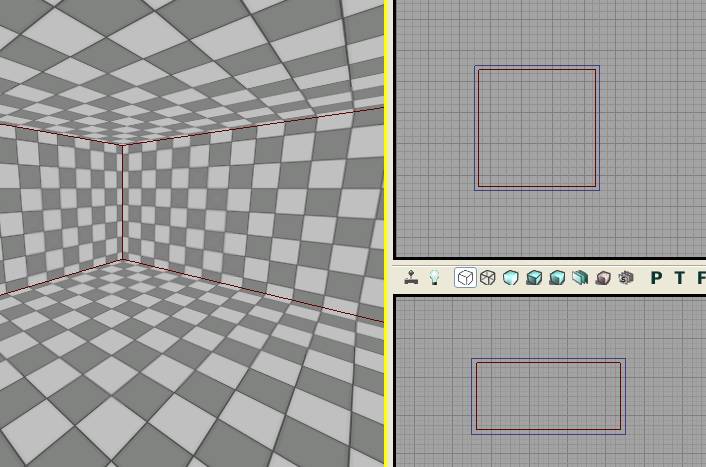
Now resize your builder brush (in both the top and side views) to fit just inside of the additive brush, and hit CSG:Subtract.Ā If you fly the camera inside the cube you can see that itÆs hollow!
WeÆre almost ready to play, but we need some default lighting, and we need to tell Unreal where the player is going to spawn.