Learning Unreal Engine 3 ¢ UE3 Editor
Editor Basics Topic 3 ¢ Your First Level Part 2 ¢ Testing and Texturing
If you havenÆt already, please follow through Your First Level - Part 1
9) Placing lights and a player start
For this section weÆll be placing actors, so weÆll be mostly working in the 3D view.Ā Close the geometry tools window (click on the Camera Mode button) and save your work.
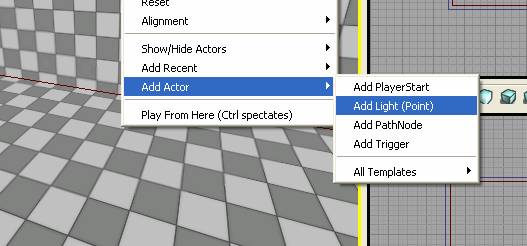
First weÆll place a light.Ā ItÆs easy ¢ right-click on the ground, then click on Add Actor->Add Light (Point).
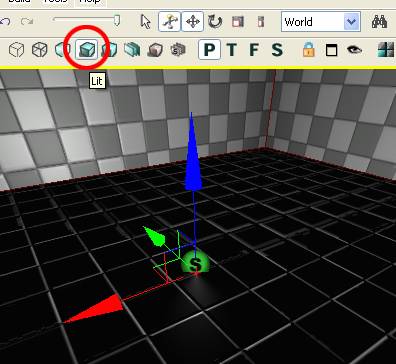
The light should appear where you clicked.Ā Go into ōLitö mode, and youÆll see your room appear with lighting now (though it looks a little strange since the light is right on the floor.)
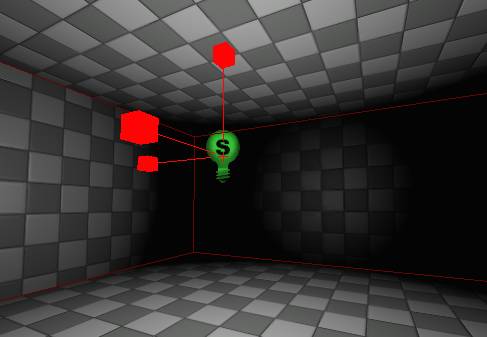
Move the light up from the floor so itÆs in the middle of the room.Ā You can also make the lightÆs radius bigger and smaller using the Scale tool.Ā Give it a try.
The last thing we need to do before we run is to ōBakeö lighting. ĀRight now the light is calculated dynamically, which is expensive and unnecessary.Ā If we bake it, it calculates texture maps for any light and shadows in the scene, which is much cheaper.Ā Click on the ōBuild Lightingö tool ¢ itÆs right next to Build Geometry.Ā The default settings in the Options window are fine, so hit OK.

Baking should go pretty fast since this is a really simple scene, but for a finished level, it can take up to an hour.Ā (Depending on your machine, the size of the level, and the complexity of the lighting of course.)
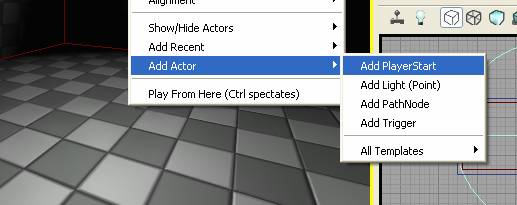
One last thing before we can play ¢ create a ōPlayer Startö.Ā Same as adding a light, right-click on the floor, then click Add Actor->Add PlayerStart.Ā The player start should appear at the proper height off the ground.
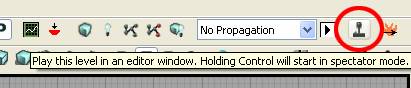
Save your work.Ā To run the level, click on the ōPlay in Editorö button in the top-right corner of the window.Ā (It looks like a little joystick.)
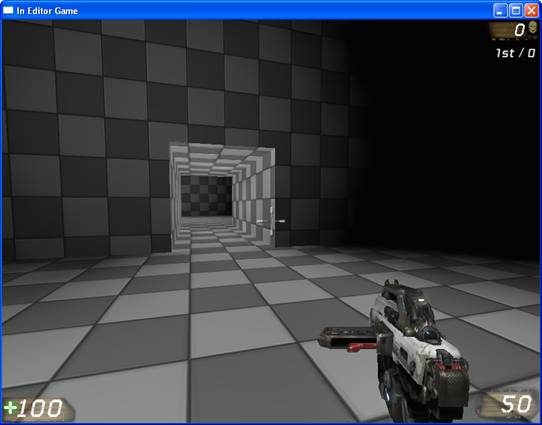
Yaaay!

10) Creating a hallway and a second room
At this point you should be able to create a second room and a hallway without any more guidance, but IÆll take this opportunity to show a few more tricks.Ā Save your work, and then save it as a new file, DM-CSGTest04.upk.Ā
WeÆll create the second room first, and then the hallway.
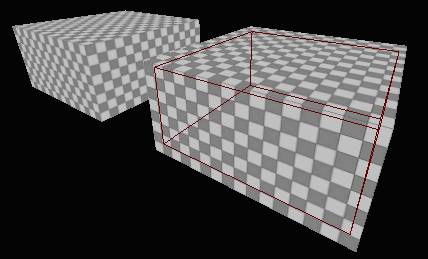
Instead of building the second room from scratch, letÆs select the first room and everything in it, then clone it over.Ā In one of the 2D views, ctrl-alt-drag a selection box around the entire room.Ā We want the player start and light too, theyÆll be useful later.
Then alt-drag on the move tool to copy the room over to the right side.Ā

Press the ōRebuild Geometryö button and go to unlit mode, and you should see both rooms in your 3D view.Ā (Remember, there are no lights outside, so the outer surfaces will show up black!)
Time to create the hallway.Ā We could clone a room again and shrink it down using the Geometry Editor tools.Ā But letÆs build it from scratch.
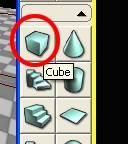
Clicking on the ōCubeö button on the left will reset the builder brush to the default 256x256x256 cube.Ā
ģ but if you right-click on it, you get a dialog box where you can type in how big you want it.Ā Measure how far apart your rooms are, and fill that into the properties.Ā (Mine were 512 units apart in the Y dimension.)Ā 256 is fine for the corridorÆs width and height (X and Z.)Ā
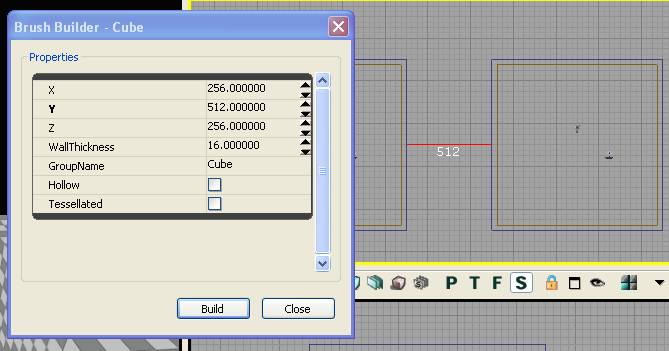
Click on Build, place the builder brush between your rooms, and click on CSG:Add.
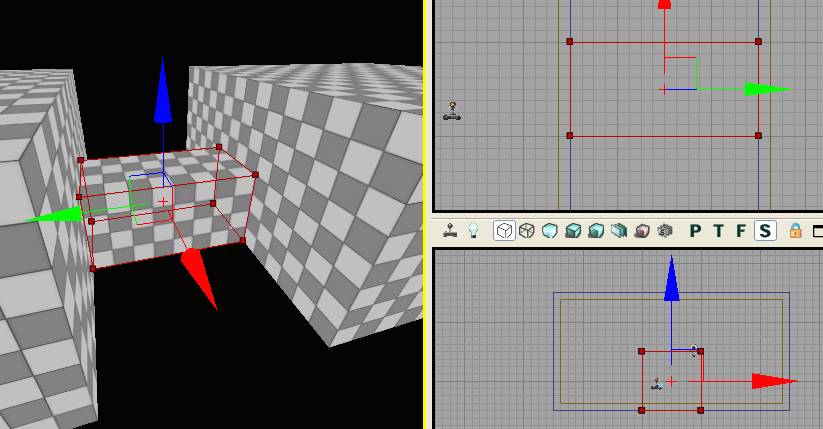
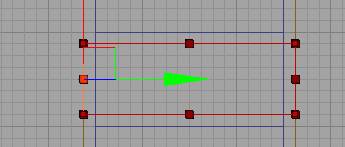
Now like with the rooms, use the Geometry Tools resize the builder brush to be just slightly smaller than the additive brush, and most importantly, make sure itÆs long enough to connect the interiors of the rooms.Ā Click on CSG:Subtract.
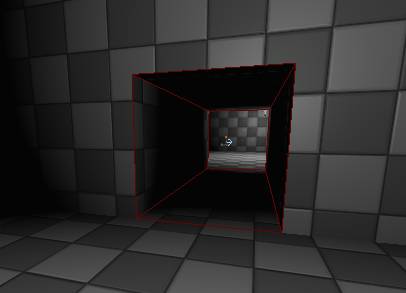
Go back inside of the rooms in the 3D view and turn on Lit mode.Ā You should see a corridor connecting your rooms.Ā
Add some extra lights to the hallway.Ā Instead of going through all that right-click nonsense, you can hold the ōlö key (ōlö for ōlightö) and click on the floor.Ā Rebuild lighting, save your work, and test your level!
11) Applying Materials to CSG
ItÆs time to get rid of that gray checkerboard pattern covering the walls and floor.Ā
You can apply either a Material or a Material Instance to a surface.ĀĀ (WeÆll discuss the differences later.)Ā Both types of materials show up in the generic browser with a green border.

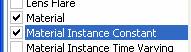
LetÆs find a material that we can apply to our CSG surfaces.Ā Open the generic browser, and in the filter list, check ōMaterialö and ōMaterial Instance Constantö.Ā (If you have anything else checked, like ōStatic Meshö, uncheck it.)Ā
Click on some packages.Ā (Any of the ones starting with ōHU_ö contain Human environment assets, which is a good start.)Ā YouÆll see a few materials show up, but not many ¢ thatÆs because the packages havenÆt been fully loaded yet.Ā Select a package, right-click on it, and select ōFully Loadö. Ā
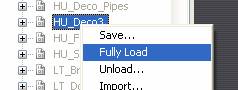
You can select multiple packages at the same time by ctrl-clicking on their names, or by shift-clicking to select a block.Ā Select all of the HU_ packages now, and fully load them.Ā YouÆll have a lot more materials to choose from.
Applying a material to a surface is really easy.Ā Select the surface (click on it in the 3D view) then click on a material in the generic browser.Ā The material will appear.Ā Try it now.Ā
Ok, I didnÆt pick a very good material, but it works.
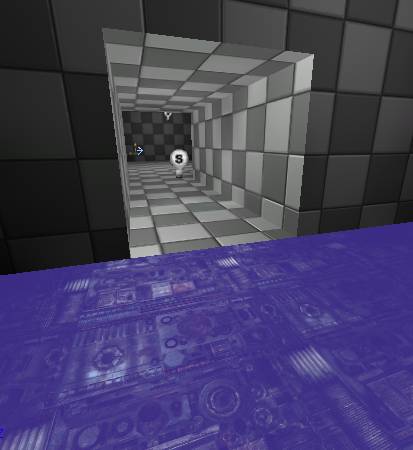
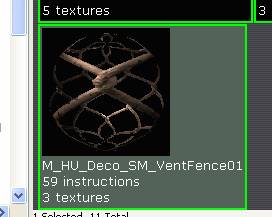
One thing to watch out for ¢ some materials have transparent parts.Ā For instance, fully load the HU_Deco3 package, scroll to the bottom, and look at M_HU_Deco_SM_VentFence01.Ā ItÆs a chainlink fence material, and you can see between the wires.Ā This is a good example of what not to apply to a surface!
Now, you COULD select surfaces in your level one by one and apply materials, but there are some tools for selecting multiple surfaces at once.
First, you can select multiple surfaces at once by holding the ctrl key and clicking on them one by one.Ā Try that now.Ā (You can also ctrl-click a selected face to unselect it.)Ā
There are also a bunch of options under the right-click menu.
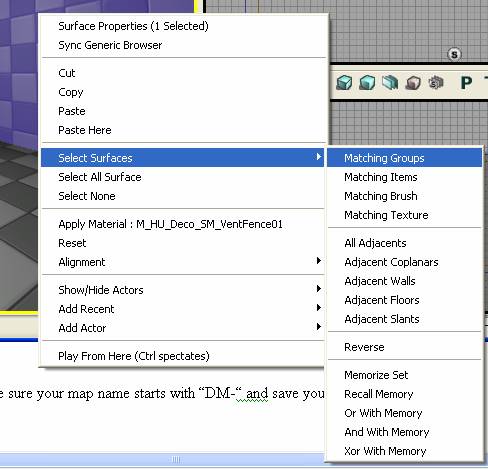
I wonÆt go into detail, but try a few of these options and see what they do.Ā You might want to start with ōMatching Textureö ¢ thatÆll select all checkerboard surfaces.Ā You could also try ōMatching Brushö to select the entire room, or ōAdjacent Wallsö to select all connected walls.
Take a few minutes now and replace all checkerboard surfaces in your level with appropriate-looking floors, walls, and ceilings.
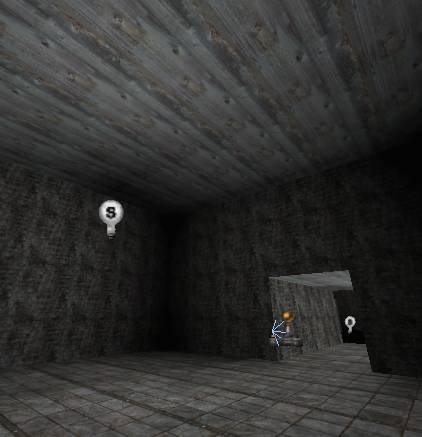
Extra credit if yours looks better than this!
12) Surface Properties
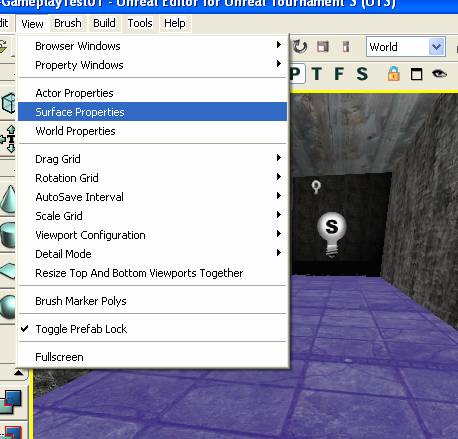
Now letÆs look at how to change the alignment, rotation, or scale of your material.Ā Select a face and go to View->Surface Properties (or hit F5).
The best way to learn the tool is to try it out for yourself.
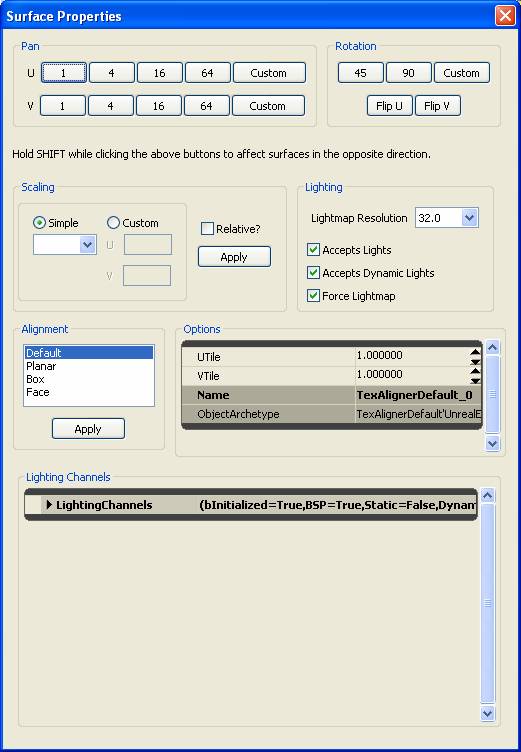
Panning and Rotating are easy, just click the button you want and the material updates on the surface.Ā (You can shift-click on a button to move or rotate the opposite direction.)
Changing the Scale is nearly as easy, but once you select a scale option, you need to press the ōApplyö button just to the right of the scale.Ā The default scale is 1, and larger numbers mean the material will cover a larger area.
The other thing you can control on this menu is the surfaceÆs lighting properties, but weÆll discuss that more when we talk about lighting.
13) Adding bots
Now, IÆll cover this in much more depth later, but it would be fun at this point to add some bots to the level.Ā Make sure your map name starts with ōDM-ō and save your work.
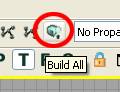
In the editor, click the ōBuild Allö button (to the right of Build Lighting.)
Save your game and run it.Ā Open up the console by pressing ōTabö, and type ōaddbots 1ö.Ā A bot should appear, and you can kill it!Ā

To add more bots, add more PlayerStart nodes, rebuild all, run the level, and type ōaddbots [number]ö in the console.
Have fun with it!Ā Try adding some additional rooms, and make a more interesting layout.Ā See if you can make ramps to rooms at different heights, or raised platforms inside of a room.