Learning Unreal Engine 3 ľ UE3 Editor
Editor Basics Topic 4 ľ Adding Gameplay Elements to your Map
This section explains how to get all of the basic gameplay elements into your map.á In this example weĺll set up a Deathmatch map, which is the easiest type to create.á Capture the Flag and Warfare maps (and vehicle variants) have a couple additional node types you need to add, which are discussed at the end of this tutorial.
The following map files contain examples of the features discussed on this page. Feel free to use them as reference, or as a starting point for your own maps.
Gameplay Examples CTF Gameplay Examples
1) Naming conventions
First off, naming conventions are important.á Theyĺre the primary way that Unreal Tournament 3 knows what type of map youĺre playing. Start your map name with one of the following tags, depending on the intended gameplay type.
DM- (Deathmatch, Team Deathmatch, Duel)
CTF- (Capture the Flag)
VCTF- (Vehicle Capture the Flag)
WAR- (Warfare)
So if you want to make a Warfare map called ôFirePitsö, youĺd name it ôWAR-FirePits.ut3ö.á
For this tutorial weĺll create a Deathmatch map.á Start by creating a new map or opening an existing map youĺve created.á Save it as DM-GameplayTest01.ut3 in the following folder.
My Documents\My
Games\Unreal Tournament 3\UTGame\Unpublished\CookedPC\CustomMaps\
This is the official place where Unreal likes to look for maps, so get in the habit of saving everything there.á (If you put the map somewhere else, especially if youĺre streaming or loading separate packages, Unreal wonĺt be able to find it.)á If you want to make a sub-folder, thatĺs fine too.
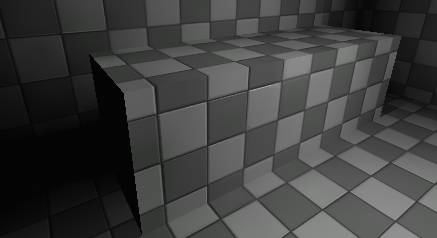
Build out your map so that it has at least three rooms connected by hallways, and that theyĺre not in a straight line.á Something like this:
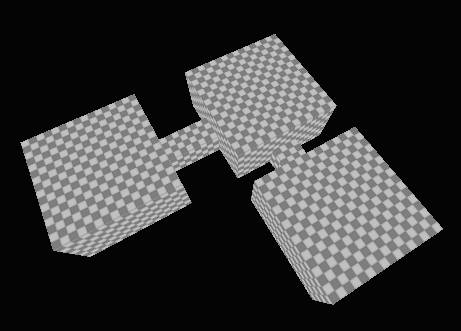
If you named it properly, Unreal will recognize this as a deathmatch map, and once we place the proper actors, Unreal will let you play it as a Deathmatch, Team Deathmatch, or Duel map.
3) Player start
If youĺve been following the tutorials so far, you may have noticed lots of errors that look like this.

Guess what?á Unreal supports up to 16 players in Deathmatch, so we need to have at least 16 PlayerStart actors.á Normally your level will be big enough that placing all of these spawn points makes sense (and you may place even more), but it probably seems kind of silly right now.á Thatĺs ok, we still want to place 16.
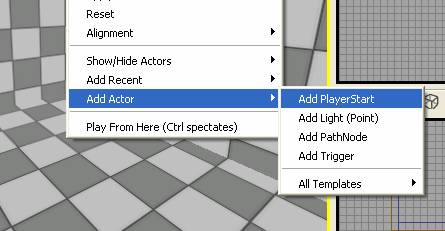
You can place a new PlayerStart node by right-clicking on the ground, selecting Add Actor, and clicking on Add PlayerStart.
If youĺve already placed one you can clone it around by alt-click-dragging on one of the move toolĺs handles.á Do this until you have 16 nodes spread all over your level.á Try to make sure theyĺre at least 128 units apart if not more.á (Remember you can middle-click-drag in a 2D view to use the measure tool.)
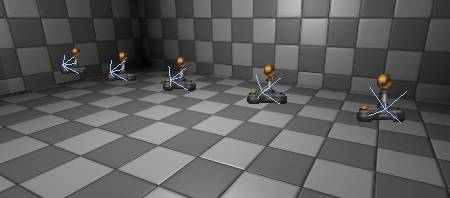
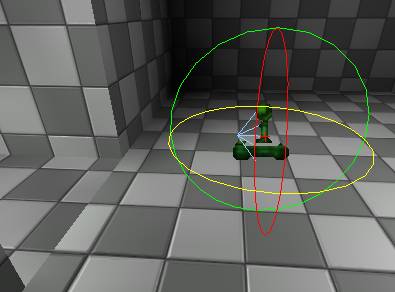
Also, see the little blue wireframe arrow pointing out of the nodes?á Thatĺs the direction the player will be facing when he/she spawns.á You may want to rotate some of your PlayerStart nodes so that theyĺre facing in a sensible direction.
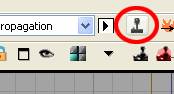
4) Play In Editor
Weĺll cover this in more detail in another tutorial, but you can test your map by clicking the Play in Editor button (the little black joystick at the top-right corner of the window.)
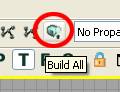
If your map shows up black, or just generally isnĺt doing what you expect, you may have to hit ôBuild Allö and try again.
Once youĺre up and running properly, press the ôTabö key to bring up the console, and type ôaddbots 1ö.á A bot should appear somewhere in your level.á Go kill it!
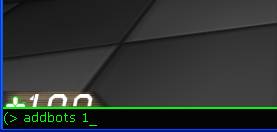
You can, of course, add as many bots as you want with that command, up to 16.á Give it a try - itĺll be chaotic, but very rewarding!
5) Pathnodes
Bots are stupid.á All they know how to do is point at the nearest target and shoot, or run for the nearest pickup thatĺs in sight.á Theyĺre great at getting to things they can see.á But how do they get from room to room?á If their health is low, how do they find their way to a health pickup?á Well, Unreal generates a path network that connects everything in your level.á That way if a bot has no one to shoot, or is low on health, they know how to run through hallways to different rooms where there are goodies for them to pick up.
To start, click on the ôBuild Pathsö button at the top of the screen.
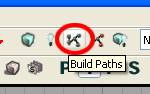
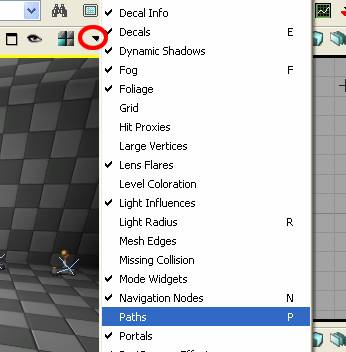
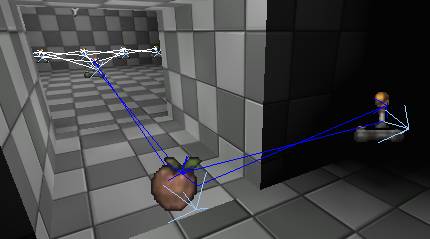
Paths are automatically generated connecting every player start in the level.á You can view your path network by clicking on the black arrow thatĺs at the top of a viewport and clicking on ôPathsö.á (Or you can just press the hotkey ôpö.)
Any player starts that are in view of each other should now have a line connecting them.
But what do we do in a situation like this, where PlayerStart nodes canĺt see each other?á We definitely donĺt want to move the PlayerStart, or add more.á
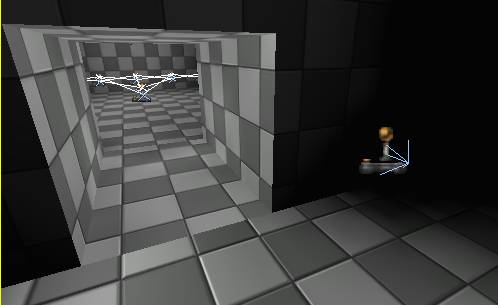
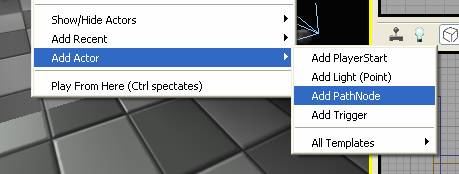
Unreal has an actor called a PathNode, which does exactly what we want ľ we can place it in the hallway, and Unreal will connect our rooms together.á Right-click on the floor, then select Add Actor->Add Pathnode.á Or better yet use the shortcut ľ hold down the ô.ö key and click on the floor.
An apple icon appears.á Click the ôBuild Pathsö button and you should see some more connections.á You may have to move the pathnode around (and rebuild paths) to get it to connect up, or you may need to add more than one pathnode.á
Add a few pathnodes to your map now and make sure every room is connected by paths.á Run the game, and add a few bots, and youĺll see theyĺre now able to traverse the whole space.
6) Creating effective path networks
As I mentioned before, bots are great at getting somewhere if they have a line of sight, and a path network is a way for bots to find their way to areas they canĺt see.á Bots can use their line-of-sight trick to get to pathnodes too, so theyĺll cut corners instead of following your path network rigidly.á As a result, you donĺt need to cover every square inch of a room with pathnodes ľ just the routes a player might follow.á Most gameplay objects act as pathnodes too, so a player start or weapon pickup will fill in your path network in some areas.
The best way to learn how to make a good path network is to experiment.á As a general rule, if the player can get through a space, you want to make sure thereĺs a path generated for bots to get through as well.á When your level layout is getting detailed, start testing it with bots.á Are there places the bots just donĺt go?á Do they get hung up in a hallway?á Do they run really far out of their way to get somewhere?á You may need to tune your network or add more pathnodes.
You can also learn a lot by looking at UT3 maps in the editor.á Study how Epic places pathnodes in different situations.á
Here are a couple pointers to get you started.á Generally, youĺll need pathnodes in the following places:
- At every doorway or entrance to a room
- The bottom and top of a staircase or ramp
- Any place where a hallway turns a corner
- Any place where a bot can jump up or down from a ledge
- Any place where a bot should be able to use a translocator to get up to a ledge
- Around any large objects inside a room
You DONĺT need to add pathnodes to these places:
- Along the length of a straight hallway
- In the corners of an empty room.
7) Troubleshooting path networks
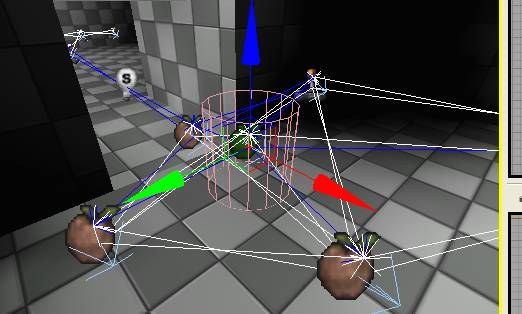
At some point youĺll probably place a pathnode that doesnĺt add anything useful to the path network, like in the image below.á (The path already goes all around the room, so why would we need the extra apple in the middle?)
If you have unnecessary nodes, youĺll get warnings like this:

Either delete the pathnode listed in the warning message, or move it around to a more suitable location.á (Maybe itĺs just a little too close to its neighbor, or not aligned with a hallway/stairwell/opening properly.)
You might be wondering what all the different colored and shaped paths are.á
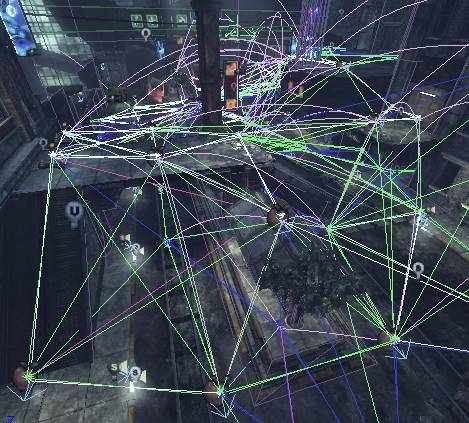
The coloration of the path line tells you what kind of a path it is (ground, flying, jump) and how wide it is.
- Blue - narrow path
- Green - normal width
- White - wide path
- Pink - very wide path
- Orange - Flying path, narrow
-
Light
- Light Purple - requires high jump (higher than normal jump capability)
- Yellow - forced path
- Purple - "advanced" path (requires "intelligence" to be used)
-
Straight lines
mean the bot can run, jump, or crouch-walk along the
path
- Curved lines mean the bot needs to use a translocator to take the path
And as a general guide for heights:
- Jump Height ľ 48 units
- Double-Jump Height ľ 88 units
(Note that if you jump and catch a ledge just right, you can actually get a little higher than this because you ôstepö up onto it..)á
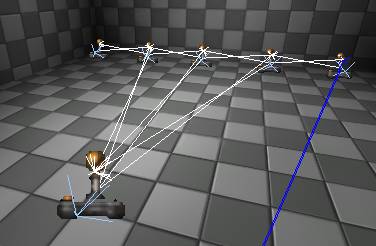
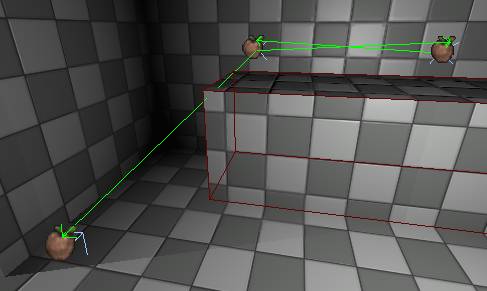
Youĺll notice sets of pathnodes usually have two lines connecting them, and the lines end with an arrow.á Those arrows indicate the direction in which the path runs.á In the following example, bots can freely run between the pathnodes on the ledge, but can only jump down from the ledge to get to the pathnode on the bottom, not back up again.á If this wasnĺt your intention, you may need to lower the ledge, add a ramp or some stairs, or add some smaller objects the player/bot can jump on to get up to the ledge.
For more information on pathing and AI, see the following link
https://udnbeta.epicgames.com/ue3/Documentation/NavigationAI.aspx
8) Placing pickups
So you can run around your level and shoot stuff, but without weapon pickups, health, and armor, the level feels kind of dull.á We can get at all of the weapon pickups (and a lot of other good stuff) through the Actor Class Browser.
Open up your Generic Browser, and click on the tab labeled ôActor Classesö (at the top of the window)
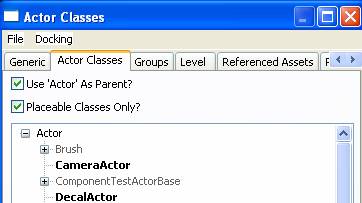
Finding pickups in the list is hard unless you know where to look.á Theyĺre all hidden under NavigationPoint.á (Thatĺs because, from a code standpoint, theyĺre all based off of the code that knows how to create paths.)
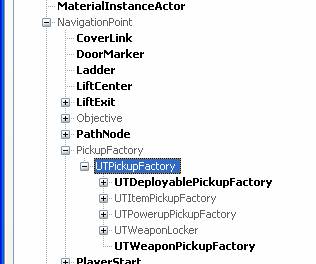
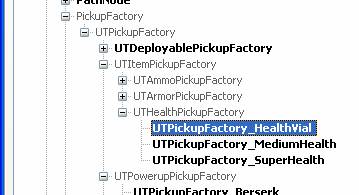
Open up NavigationPoint, then PickupFactory, then UTPickupFactory.á Youĺll start to see some of the things youĺre looking for, like a Weapon Pickup Factory.á You can open up subfolders to get at other object types, like Ammo, Armor, Health, Powerups, and Weapon Lockers.
Select one of the bold items (Say, UTPickupFactory_HealthVial.)
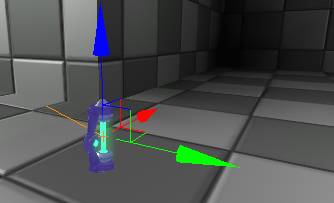
Now right-click in the world, and then click on ôAdd UTPickupFactory_HealthVial Hereö.

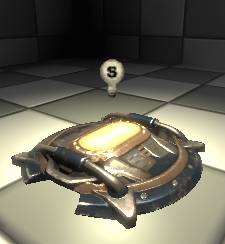
As youĺd expect, a health vial appears.á
If you generate paths and run your map, youĺll be able to pick up the health vial to heal yourself, and bots will pick it up as well.
9) Placing weapons
Most pickups (like the health vial) just require you to place them in the world and youĺre good to go.á But for weapon pickups and weapon lockers, you need to specify what kind of weapons will be available.á Place a UTWeaponPickupFactory in your level (the same way you placed the health vial.)á Make sure the object is selected in the world, then click on View->Actor Properties (or double-click on the object, or press F4).
 á
á
Every object, even static meshes and brushes, have properties you can set.á There are lots of categories in the properties window, and most of those categories (like Display, Movement, and Object) are used by every type of actor.á In most cases you only care about the properties for the specific type of actor youĺre working on.á In this case, we want to set the weapon pickup factory properties, so click on the UTWeaponPickupFactory category.á (It may be open already.)
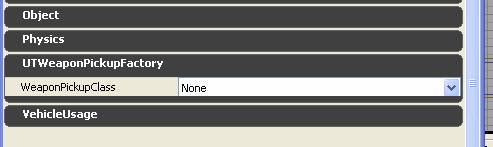
You can now pick what type of weapon you want by clicking on the word ôNoneö to the right of ôWeaponPickupClassö and choosing one of the weapon options.

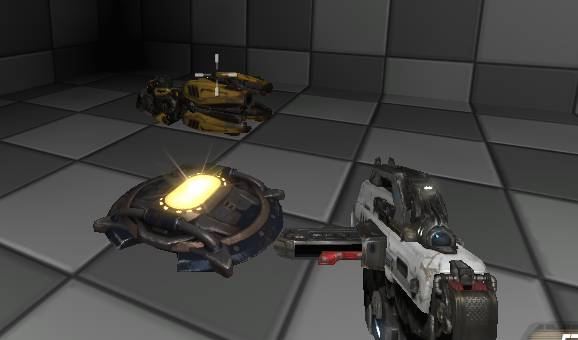
If you run the game, the weapon shows up.
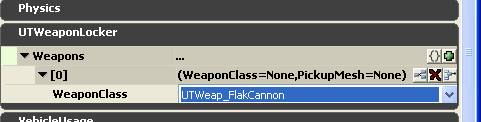
WeaponLockers are a little more complicated to configure.á Add a UTWeaponLocker_Content to your level, the same way you added the UTWeaponPickupFactory.á Open up its properties and open the UTWeaponLocker category.
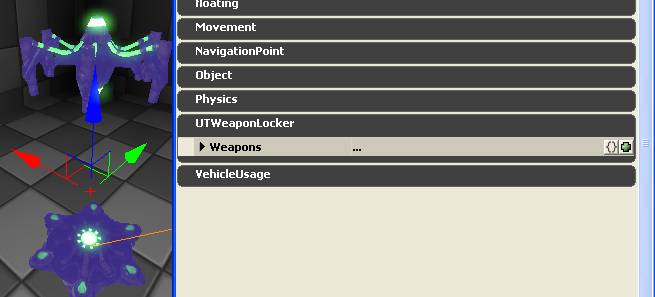
It looks like we can have a whole list of weapons, but right now thereĺs nothing in the list.á (Click the little black arrow, youĺll see thereĺs nothing there.)á To add more weapons to the locker, click the little green dot on the right side of the window.á Youĺll see that a new line appears underneath.
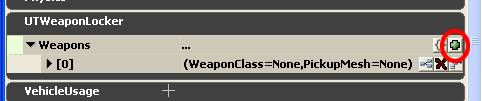
Open that up, and you can set the weapon class just like you did earlier.
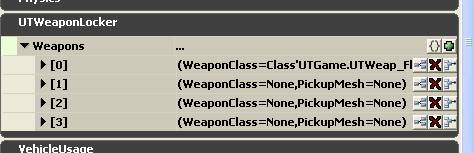
Clicking the green dot multiple times lets you add lots of weapons to the locker.á Mouseover the other icons too, they let you do other useful stuff like delete a weapon from the list.
One final note about pickups ľ when you build paths, youĺll probably notice warnings like this:

Donĺt even worry about figuring out what pickup lights are, or placing them manually.á Just go to Tools->Add Pickup Lights.á
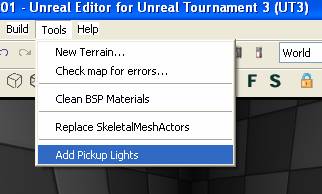
Lights will automatically be created over every pickup.á If youĺve moved or deleted a pickup, the old light will be updated properly.
10) Jump pads
Jump pads launch the player into the air, ultimately to come down at a specified location.
To create a jump pad, you need to place a jump pad base, and then tell it where the player is supposed to land.á But first, modify your level so that one of the rooms has a ledge or a platform big enough to run around on.
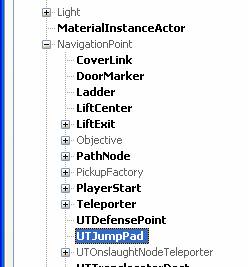
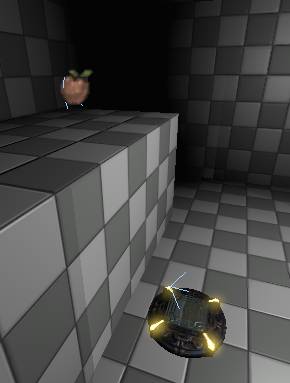
Placing a jump pad is the same as placing any pickup.á Itĺs in the Actor Classes browser under NavigationPoint ľ itĺs called UTJumpPad.á Create one next to your ledge, about 128 units out.
Also place a navigation point on top of the ledge ľ the jump pad will eventually lead here.
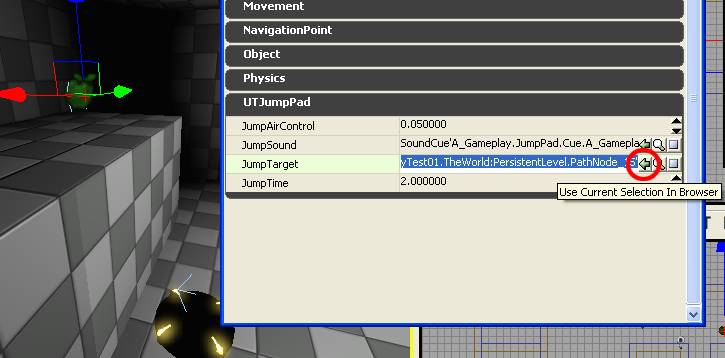
We specify the jump padĺs target in its properties window, similar to how we specified what weapon a weapon pickup will spawn.á So open up the jump padĺs properties window, and open up the UTJumpPad category.á Aha!á Thereĺs a box labeled Jump Target.á (And a few other controls, which Iĺll let you explore on your own once the whole thing is hooked up.)
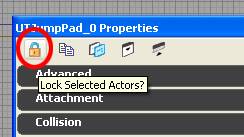
What we need to do is to plug our pathnode into the JumpTarget box.á We need to select the pathnode and then click on the little green arrow to the right of JumpTarget, but selecting the pathnode would bring up its properties instead of the jump padĺs.á So while you still have the jump pad selected, click on the lock icon in the top-left of the window.á This locks the properties on the jump pad, no matter what you select.
Now select the pathnode, and click the green arrow next to the JumpTarget property.á The path node name should fill in.
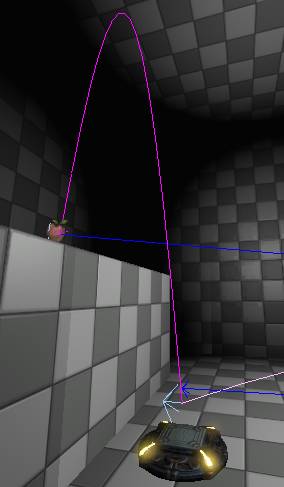
Now build paths.á With any luck, youĺll see a curved line going from the jump pad to the pathnode.á If youĺre like me though, you got an error saying the jump canĺt be made.
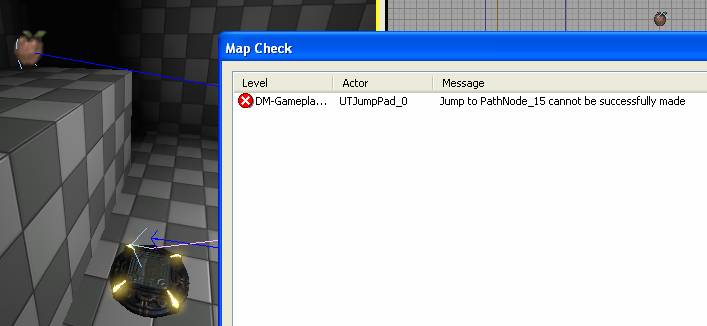
In my case, my ceiling was too low.á I raised it and the jump pad works fine now.á You might also run into problems if the jump pad is too close to the ledge, or the pathnode is too far from the edge of the ledge.
11) Other game object types
Now that you know how to create pickups and jump pads, you should be able to figure out any other gameplay object type.á Iĺll give a rough overview of some of the common ones here, without going into full detail.á This section is meant to be more of a reference guide, but if you want to add some of these object types to your level now, itĺll be good practice.
Teleporter
To place a teleporter pad, select NavigationPoint->Teleporter->UTTeleporterBase->UTTeleporter and place one in your level.á Youĺll also need an exit point for your teleporter.á You can either create another UTTeleporter (which will spawn with a base in the level), or you can simply select NavigationPoint->Teleporter for a one-way teleport destination.
Under the Teleporter properties thereĺs a field called URL.á This is the ôTagö of the teleporterĺs destination.á Select the teleport destination, bring up its properties, and open up ôObjectö.á In the Tag field, give it a name (like TeleDest01.)á Go back to your original teleporter, and fill in the destinationĺs Tag under URL.á
You can also easily make teleporters two-way by giving both a unique tag and setting each UTTeleporterĺs URL to the other.á You can even make a chain or loop of teleporters that all go to each other in order.
UTDefensePoint
This helps bots make more intelligent choices in a CTF or Warfare game.á Place UTDefense points around your flags or power cores, or any place where defense is important.á Point the DefendedObjective parameter at the specific flag or power node you want the bots to defend.á You can also type a name in the DefenseGroup field, and bots in defend mode will move between defend nodes that have a matching DefenseGroup name.á There are a few other parameters as well, but they should be self-explanatory.
UTTranslocatorDest
Building paths will automatically create some translocator jump paths, but sometimes youĺll want to force them (say, to get from a specific location to a powerup on a high ledge).á Create a UTTranslocatorDest where you want the translocator to land.á In the properties open up UTTranslocatorDest.á You can now click the green button to add multiple StartPoint slots, and then connect them to PathNodes (using the Point parameter, just like you did with the JumpTarget on the jump pad.)á
Lift (LiftCenter / LiftExit)
Lifts are a bit outside of the scope of this tutorial, but if you load up CTF-Strident, youĺll see one in action.á Basically, the lift ôPadö is an InterpActor controlled by a matinee sequence so that it moves up and down on a timer (or it could be triggered via kismet to move when the player steps on it.)á
A LiftCenter is a part of the path network that lets bots actually use your lift.á Itĺs attached to the the InterpActor (under the LiftCenterĺs properties, Attachment->Base).á Attaching the LiftCenter makes it follow the InterpActorĺs movement.á
LiftExits are the other important part of the path network.á They have a MyLiftCenter variable, which you need to point at the LiftCenter.á
If anyone knows of a good tutorial on this, please let me know!
10) Vehicles
Vehicles are very easy to add to a map.á Go into the Actor Classes window and open up NavigationPoint->UTVehicleFactory.á Select the vehicle type you want, right-click, and add it to the level.á In a VCTF or War game, the vehicleĺs team will automatically be determined by who owns the objective node itĺs closest to.á (So if itĺs placed closest to the blue teamĺs flag, itĺll belong to the blue team.)á In a Deathmatch game, any bot will attempt to use the vehicle.á
Of course, you need to make sure your level has spaces wide enough for the vehicle to pass through.á
If you want to place a vehicle boost pad, select UTVehicleBoostPad from the main Actor Classes menu (not under NavigationPoint) and add it to the level like normal.á A semi-transparent box with a scrolling texture will appear.á You can non-uniform scale it to get it to fit the area you need.á Remember to make it extra tall if you want it to affect flying vehicles.á Under the objectĺs properties, you can control which types of vehicles are affected by it (like limiting it to the hoverboard).á You can also control how much power the boost has.
Adding turrets to your level is more difficult, but hereĺs a forum post that outlines the process:
http://forums.epicgames.com/showthread.php?t=593351&highlight=UTVehicleFactory_Turret#5
12) Capture the Flag maps
CTF maps are easy to create.á There are only a few things that differentiate them from Deathmatch maps.
1) Name the file CTF-[mapname] for a standard Capture the Flag map, or name it VCTF for Vehicle Capture the Flag.
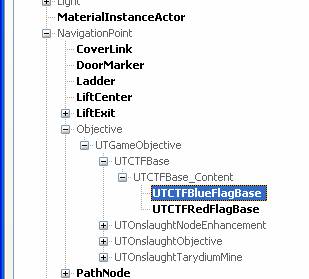
2) Add a flag base for each team.á Find them in the Actor Classes browser under NavigationPoint->Objective->UTGameObjective->UTCTFBase->UTCTFBase_Content.á Add them like you would any other gameplay object.
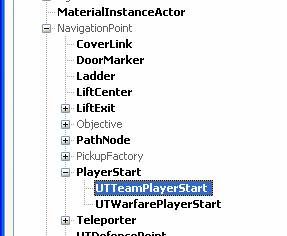
3) You also need to place a special kind of player start node, and tag it with the team that will spawn from it. áYou can place a Team PlayerStart node by selecting UTTeamPlayerStart in the ActorClasses browser under NavigationPoint->PlayerStart
Place one in the world, open up its properties, and open up the UTTeamPlayerStart category.á Set the TeamNumber filed to 0 for the Red team and 1 for the Blue team.
You may also want to set up some UTDefensePoints, as described in the previous section.
13) Warfare maps
Warfare maps are the hardest type to set up.á Most of the information youĺll need can be found in this forum thread:
http://forums.epicgames.com/showthread.php?t=594706&highlight=utonslaughtpowercore