Learning Unreal Engine 3 ¢ UE3 Editor
Editor Basics Topic 5 ¢ Running, Testing, and Distributing your Map
This section explains basic in-editor testing of your map, how to run it for real in Unreal, and how to get it out to the gaming community.
1) Proper folder setup
The first step to creating a map is to make sure itÆs saved in the right place, and has the right name.Ā Maps should be stored in the following folder:
My Documents\My
Games\Unreal Tournament 3\UTGame\Unpublished\CookedPC\CustomMaps\
The map name needs to begin with a tag identifying the game type.Ā Tags are as follows:
DM- (Deathmatch, Team Deathmatch, Duel)
CTF- (Capture the Flag)
VCTF- (Vehicle Capture the Flag)
WAR- (Warfare)
So if you want to make a Warfare map called ōFirePitsö, youÆd name it ōWAR-FirePits.ut3ö.Ā
ItÆs possible to make multiple packages and streaming maps that all feed into your final map, but if you do that, itÆs more likely that files get lost in distribution and someone isnÆt able to play your map.Ā For that reason, itÆs better to include all of your mapÆs resources inside of the map .ut3 file.Ā (Once you save your map and bake lighting, your map shows up in the package list, and you can put anything you need to into it.)Ā
2) Saving, Crashing, and Backups
Unreal Editor is prone to crashing, so be sure to save your map often.Ā ItÆs also a good idea to save multiple versions of your map.Ā (Yes, Unreal can crash while saving, and you donÆt want a corrupted map!)Ā
Say your map is called DM-FirePits.Ā You might want to save it as a new version every day you work on it.Ā (So DM-FirePits01.ut3 for the first day, DM-FirePits02.ut3 the next day, etc.)Ā Or, save as a new version every time you complete a major task ¢ initial layout, placing gameplay objects, adding textures, gameplay iterations, etc.Ā
Unreal also autosaves periodically.Ā (YouÆve probably noticed!)Ā If you need to restore from an automatic backup, you can find those files here:
My Documents\My
Games\Unreal Tournament 3\UTGame\Autosaves
But again, donÆt rely solely on autosaves ¢ keeping your own incremental backups is a lot more reliable.
3) Building your Map
When youÆre ready to run your map youÆll need to build it first.Ā The easiest way, especially when youÆre just starting, is to hit ōBuild Allö.Ā
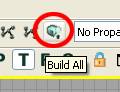
Once your map starts getting big, however, Build All may start to take a really long time.Ā In that case you may want to hit individual build buttons as you need them.
From left to rightģ
![]()
Build Geometry is only necessary when you update CSG geometry.
Build Lighting is normally the most time consuming build.Ā It calculates static lighting for all of your CSG geo and static meshes.Ā You can test your level without building lighting, but things may not look right, and you may get a slower framerate.
Build Paths is needed to tell bots how to make their way through the level.Ā
Build Cover Nodes isnÆt needed for UT3 maps.Ā (ItÆs a Gears of War thing.)
Build All does all of this work.
When you build your map, Unreal may give you a list of warnings and errors.Ā You can get a more complete list by running Tools->Check map for errors.Ā YouÆll rarely encounter a complete showstopper bug (so in other words, you can effectively test without fixing every last one) but itÆs a good idea to fix what you can before releasing your map to the public.
4) Play in Editor
The quickest way to test your map is to run Play in Editor.Ā After youÆve built and saved your map, and added any necessary gameplay objects, press the black joystick button at the top-right of the editor window.Ā
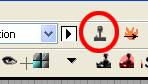
Your map will launch in a new window, youÆll spawn from a randomly-chosen spawn point, and you can test whatever you need.ĀĀĀ
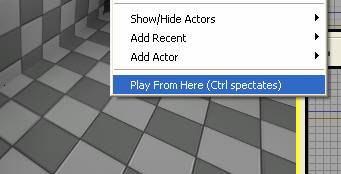
You can also right-click on the floor of your level and select ōPlay From Hereö.Ā This is convenient when you want to test a certain area of your map and donÆt want to run all the way from a spawn point.
5) Console commands
You can bring up the in-game console by pressing the Tab key.Ā This allows you to do some really useful things, like give yourself weapons, spawn bots, and get some performance measurements.Ā
HereÆs a list of the most useful console commands for testing a map.Ā Click the link below for a more complete list.
addbots [value] (adds the number of bots specified)
god (invulnerability)
ghost (use ōwalkö to drop back to the ground)
slomo [value] (1 is normal game speed, <1 is slower, >1 is faster)
viewmode unlit (use ōviewmode litö to return to normal)
loaded (all weapons + all ammo)
switchteam (respawn player on opposite team)
You can repeat the last command (or any previous command) by opening up the console and using the up and down arrow keys.Ā Which is pretty cool.
Also, here is a more complete list of Console Commands
6) Publishing
Testing with Play in Editor is extremely useful, but at some point youÆll want to test your map through the main UT3 game interface.Ā To do this, you need to Publish your map.
Publishing your map runs a final compile, which optimizes your map for file size, memory, and load time.Ā It then copies it to the proper folder so that it shows up in the main game menu.Ā Final published maps get copied here:
My Documents\My Games\Unreal Tournament 3\UTGame\Publsihed\CookedPC\CustomMaps.Ā
After you publish your map, run Unreal, go to Instant Action, go to the proper game type for your map (say, Deathmatch), and your map should be visible at the bottom of the list.Ā Load it up, and everything should play just like youÆd expect!
Once youÆve run your map in-game, youÆll see two new files in the Published maps folder ¢ <mapname>.ini and <mapname>_LOC_int.upk.Ā WeÆll talk about those more in the next section.
7) Setting up your map for distribution
Before you distribute your map, youÆll want to configure some additional information.
- The .ini file ¢ the map name, description, number of players, and screenshot
- Create a screenshot for the map to use
- Create a readme.txt file and some additional screenshots, to be included with the map zip
This setup is covered extremely well in a forum post by DGUnreal.
http://forums.epicgames.com/showthread.php?t=590932
8) Distributing your map to the community
Ultimately youÆll want other people to play your map, whether itÆs a close group of friends or the Unreal community at large.Ā Here are some thoughts regarding how to go about this.
Beta
DonÆt call your map done if youÆve only tested it on bots!Ā Release a public beta of your map as soon as you feel like the gameplay is solid.Ā Other players will help you find balance issues, exploits, bugs, and anything that just doesnÆt feel fun.
ItÆs a good idea to update your map name for every beta release.Ā (Otherwise people may have different versions of the map with the same name, and that gets really annoying.)Ā If your map is named DM-FirePits, call your first beta release DM-FirePits_Beta01.ut3.Ā When youÆre really ready to call it final, only then should you release DM-FirePits.ut3.
The Epic web site has a forum for maps in the Beta phase.Ā If youÆre looking for feedback, posting here is a good place to start.
http://forums.epicgames.com/forumdisplay.php?f=340
Final Distribution
No big trick here, you just need to get your map into peoplesÆ hands.Ā Again, posting on EpicÆs forums is a good start.Ā Look at some other peoplesÆ map threads ¢ especially the more popular ones ¢ and see how they present their work.
http://forums.epicgames.com/forumdisplay.php?f=341
DonÆt stop there though, there are plenty of other UT3 web sites and forums where you may get some extra people to play your map.
8) PS3
For information on how to publish and run your map on the PS3, please see the following reference guide:
http://udn.epicgames.com/Three/PS3Mods.html