Learning Unreal Engine 3 ¢ UE3 Editor
Working with Packages (Importing and Creating Assets)
If youÆre planning on creating any of your own custom content (textures, meshes, audio, materials) then this tutorial is for you.Ā
1) How Packages Work
As we saw in Topic 2, packages are where all of the raw assets that make up the game are stored.Ā Each package is like a zip file, and it can hold assets of many different types.Ā WeÆve already worked with static meshes and materials, but if you open the Generic Browser and look at the filter list, you can see that there are literally dozens of different types of assets that go into the game, including textures, sound files, animations, particle systems, and many more.
When you load the editor, all you see is packages that Epic created.Ā These are all locked for editing ¢ you can use their contents in your own work, but you canÆt modify the existing game.Ā (Makes sense, it would allow for cheating in multiplayer games, plus thereÆs lots of behind-the-scenes optimization going on.)Ā
If you want to create your own custom content (textures, meshes, etc) you can put them into a new package and distribute that along with your map or mod.Ā You can even save assets into your map as if it were a package.Ā WeÆll look at how to do both of these in this tutorial.
2) Creating a new package
In Unreal, thereÆs no such thing as an empty package.Ā To create a new package you have to put something into it.Ā LetÆs do that now.Ā
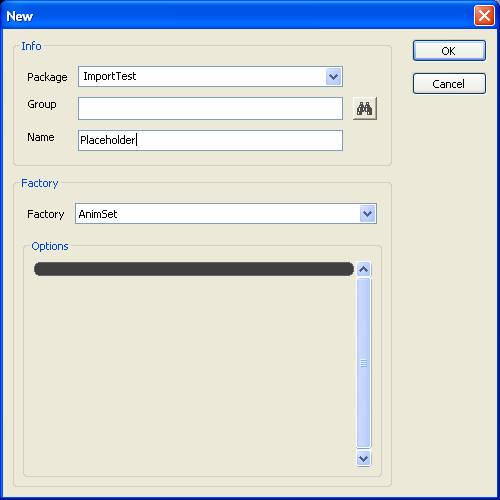
Open the generic browser and go to File->New.Ā This isnÆt the ōNew Packageö dialog like youÆd expect ¢ itÆs the ōNew Assetö dialog.Ā But by creating the asset in a package that doesnÆt exist yet, weÆre effectively creating a new package, so the result is the same.Ā
Fill in the fields like below.Ā The ōPackageö field will be the name of the new package, and the ōNameö field is the name of our asset.Ā Farther down youÆll see a ōFactoryö field ¢ thatÆs just EpicÆs terminology for what type of asset weÆre creating.Ā If you click on that field youÆll see lots of options, but this is just a placeholder so AnimSet is fine.Ā Hit OK.
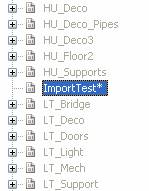
You can now scroll down in the package list and find your newly-created package.Ā Select it.
3) Saving the package
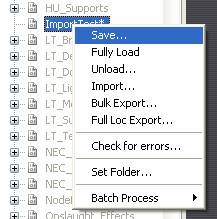
Notice the ō*ö next to your packageÆs name ¢ that means it hasnÆt been saved yet.Ā Right-click on the package and choose Save.Ā YouÆll see a standard Windows ōSave Asö dialog.
Unreal only recognizes packages that are saved in certain folders.Ā You need to save your package in My Documents\My Games\Unreal Tournament 3\UTGame\Unpublished\CookedPC\Environments.Ā (If you try to save it somewhere else, Unreal wonÆt find it next time you start the editor.)Ā
4) Importing an asset
We made our first package by creating a placeholder asset, but if you already have something you want to import, thatÆll work just as well.Ā LetÆs try importing something now.Ā IÆve created a checkerboard texture you can use for this example.Ā Download it now.Ā
http://www.waylon-art.com/LearningUnreal/checkerboard.tga
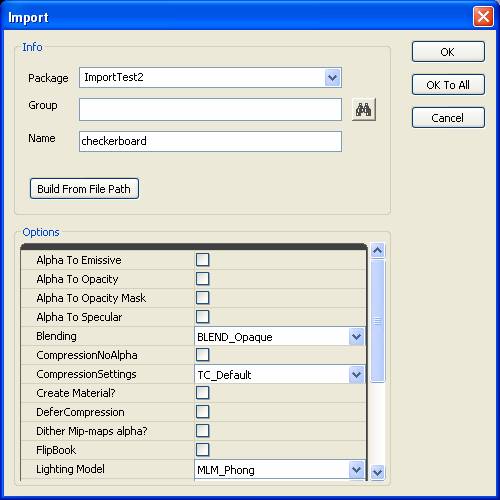
In the generic browser, go to File->Import, browse to the checkerboard.tga file you downloaded, and open it.
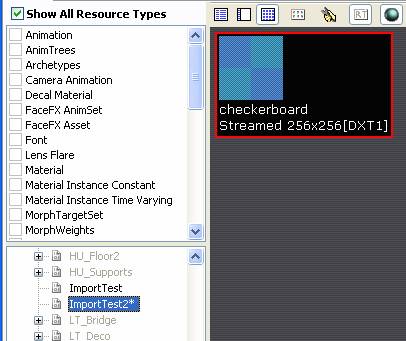
The Import dialog will open up.Ā In the ōPackageö field, type in the name of the package you want to import into.Ā (ImportTest2 is fine for now.)Ā The ōNameö field already says ōcheckerboardö because that was our filename ¢ thatÆs fine, so hit OK.
Your new package is created, and it contains the checkerboard texture.Ā You can see the package name has a ō*ö next to it, so it needs to be saved.
Right-click on it and select ōSaveö, then put it in the same folder as the other package.Ā
You can now import anything you want into either package, or create new asset types as needed!
One note ¢ when you load Unreal, your packages wonÆt show up right away.Ā ThatÆs because nothing is using them.Ā You can go to File->Open (in the Generic Browser) and load your package that way.Ā Or, if youÆve got a map that already uses assets from your package, your package will show up automatically once you load your map.
5) Working with the Map as a Package
When you bake lighting on your map, Unreal stores the bake as a series of textures inside your map file.Ā WhatÆs cool is that your map will actually show up in the Generic Browser and you can look at those lightmap textures.Ā WhatÆs even cooler is that you can treat your map like any other package, and bring in any other asset types you want.Ā This is really useful when youÆre creating a map that you hope to distribute online ¢ you only need to worry about passing around one map file, rather than a map plus a bunch of packages.Ā
ThereÆs a big downside though ¢ Unreal likes deleting stuff out of the map if itÆs not in use.Ā (This is a side effect of the way it handles lightmaps.)Ā
I donÆt recommend putting assets in your map package while youÆre developing the level, but you may want to move custom assets to the map right before distributing it to the community.
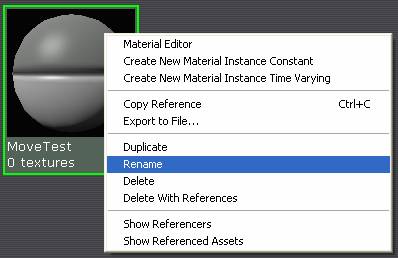
To move an asset, right-click on it and choose ōRenameö.
In the pop-up menu, change the ōPackageö field to the name of your map and hit OK.
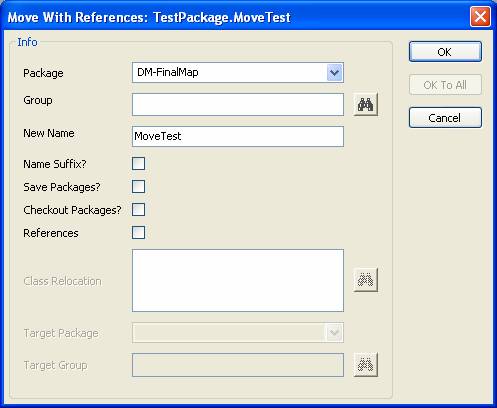
You can select multiple assets and choose Rename, and you wonÆt have to fill in the Package field every time.