Learning Unreal Engine 3 – UE3 Editor
Material Basics
This tutorial explains the basics of creating a material. We’ll build some basic (but extremely useful) materials from scratch, and in the process, learn how the material editor works.
1) What is a Material?
A material, in essence, is a small computer program that describes how a surface looks. There’s a lot we can do with our surfaces. Look around you – the world isn’t just covered with flat paint. You may have a soda can that’s highly reflective sitting on your desk. Your computer monitor has a dull gray color when it’s turned off, but it glows when it’s on, and probably has some glare too if there’s a bright light behind you. And if you’re in a room with a plaster wall, it probably has a bumpy surface that picks up highlights and shadows when light hits it at an angle.
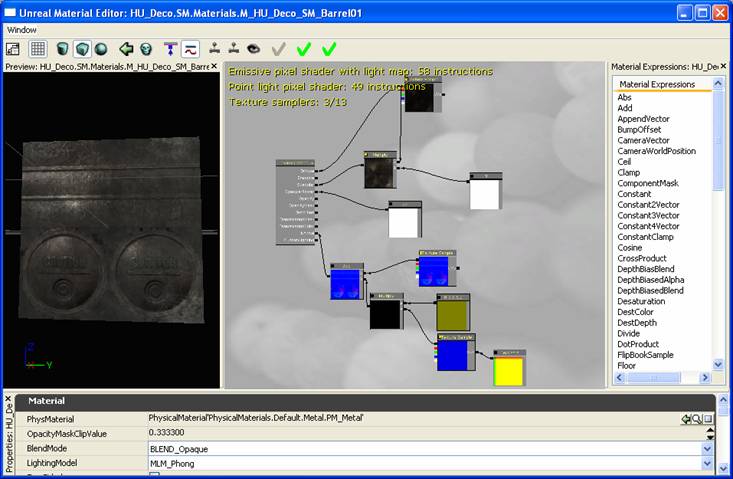
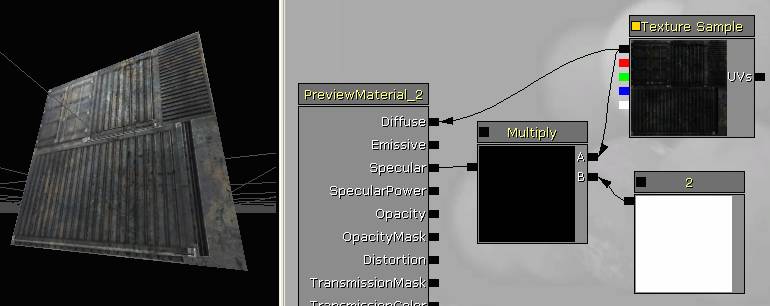
All of these effects are easy to achieve with the Unreal material system. For instance, here’s the material for a metal barrel. You can see in the preview on the left that it has a base color, shiny highlights, and ridges and bumps that bring out detail in the surface. The node network in the middle is what describes how the surface looks, and that’s what you’re going to learn to build.
2) Creating a new material
Before you create a new material you’ll need a place to test it. Create a new level that’s a simple BSP room with a light in it, build lighting, and save it as DM-MaterialTest.ut3.
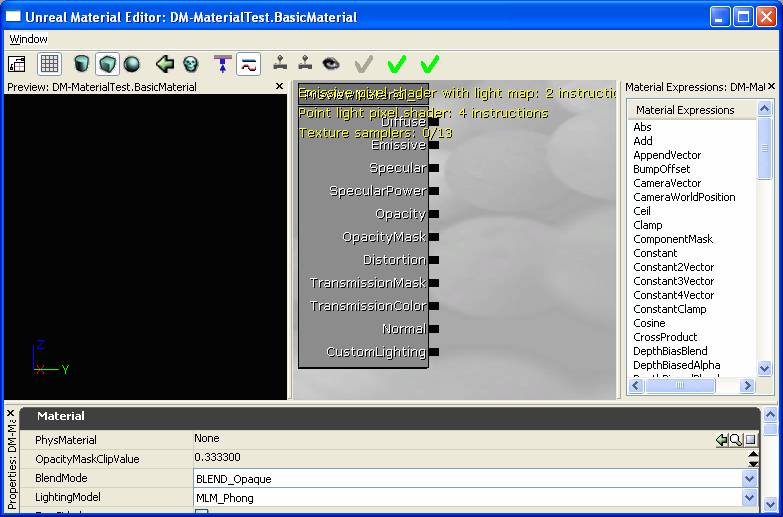
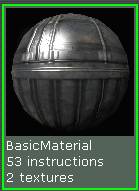
Open the Generic Browser, right-click in the blank gray space of the browser window to the right, and select New Material. Name your new material “BasicMaterial” and fill in a package name (either create a new package, or fill in an existing one.) Hit OK.
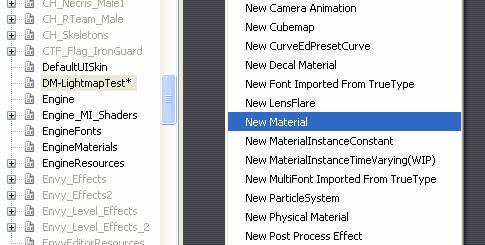
The material editor opens up. We haven’t hooked up any nodes yet, so our material preview on the left is black. Let’s fix that.
3) Adding textures to your material
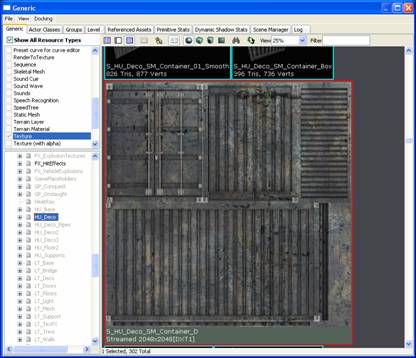
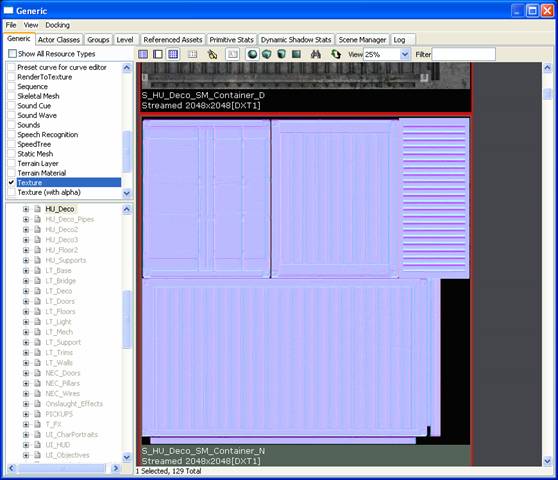
Practically every material you see in UT3 gets its look from texture maps. Let’s add one now. Leave your Material Editor window open, and switch to the generic browser. Find the package labeled HU_Deco, right-click, and fully load it. Look for a texture labeled S_HU_Deco_SM_Container_D. (Look for it alphabetically, or you can filter by type to make your job easier.)
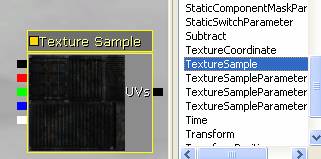
Select the texture and switch back to your material editor. What we want to do is create a node representing the texture. In the Material Expressions list on the right, scroll down until you see “TextureSample”. Select it, then click-drag it into the gray viewport to the left, and a Texture Sample node should appear. (If the node turns out black, you may not have had the texture selected in the generic browser. Delete it and try again.)
Now let’s hook the texture node up so that it shows up on the surface. The black dot at the top-left of the texture node is the output. If you click and drag on that dot a line will appear - drag a line to the “Diffuse” input of the big box to the left.
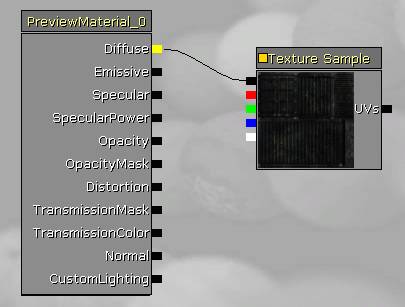
The line connects, and you should see a preview of your material on the left. “Diffuse” is the input that allows a texture to display on a surface. It’s the basis for just about every material.
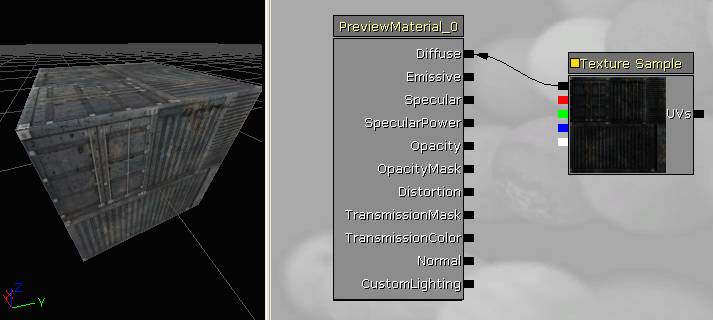
If you need to, you can move your Texture Sample node around by ctrl-click-dragging it. Give this a try now.
4) A more advanced material
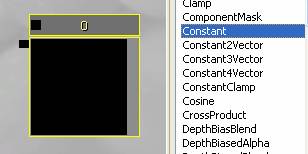
This texture is supposed to represent a metal surface, so let’s make the material shiny. There are a couple ways to do it, but let’s use this opportunity to learn about a new node type – a “Constant”. Find the word “Constant” in the Material Expressions list, and drag it into the editor viewport.
Connect the new Constant node to the “Specular” input on the left. (“Specularity” is rendering terminology for shininess.)
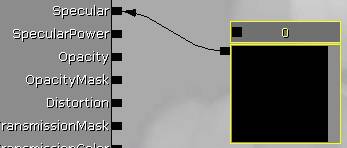
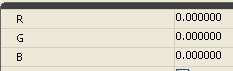
It didn’t seem to have any effect. Right now the constant has a value of “0”, which means no specularity. Select the constant, then at the bottom of the window, in the properties window, you’ll see it has an “R” value of 0.000000. Change it to “2”.
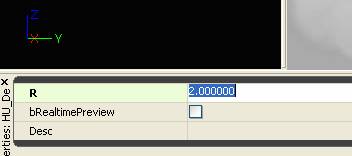
Rotate the preview cube around and you’ll see that now it’s much shinier.
5) Adding a normal map
Right now lighting affects the surface as if it were completely flat. We can add a normal map to make the material appear to have depth. You’ve probably noticed that for almost every diffuse texture, there’s a pale blue texture with similar sorts of details. Those are normal maps. Go back to the generic browser, and in the HU_Deco package (just below the texture you added earlier) you should see a pale blue texture named S_HU_Deco_SM_Container_N.
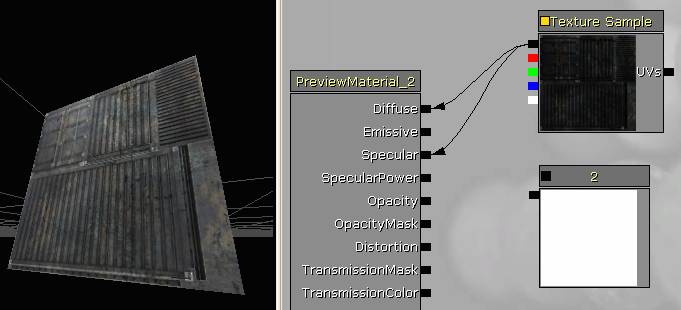
Select it, go back to your Material Editor, and drag another
TextureSample node into the editor. Hook it up to the “
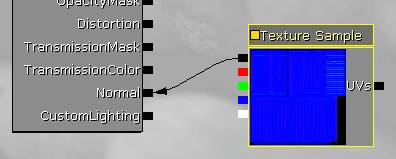
Now there’s a lot more depth to the lighting and reflections.
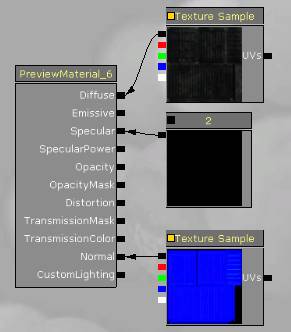
Your node network should now look like this.
6) Seeing your material in the world
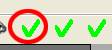
Unreal needs to compile your material before it can use it in the scene. There are three green check marks at the top of the window. Hit the one on the left.
You’ll see the material’s thumbnail in the generic browser has updated.
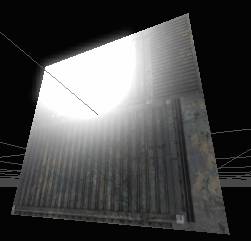
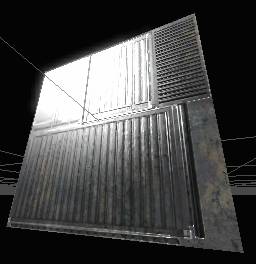
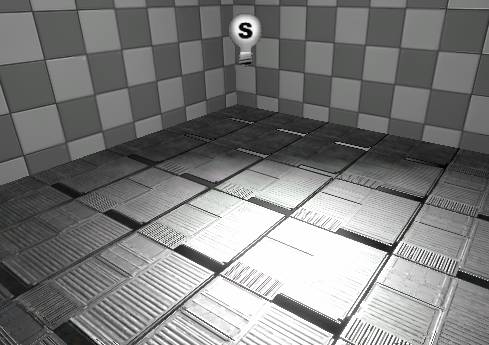
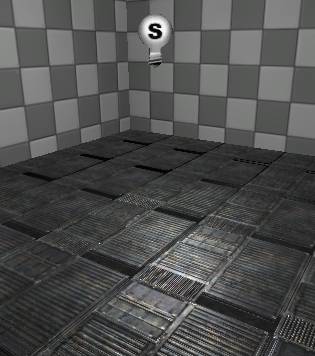
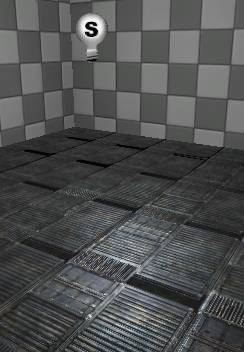
And you can apply it to a surface in the world – you can see here the floor is reflecting the light in the middle of the room.
7) Better-looking reflections
Ok that really doesn’t look like metal. It’s too bright for one thing, but it’s also too uniformly shiny. The diffuse texture has lots of darker rusty areas that shouldn’t be as shiny. You can hook the diffuse texture sample directly into the Specular input, and the color of the texture will control the specularity. Do that now.
The highlight definitely looks better, but now it’s probably too subtle. Let’s look at how to brighten it up.
We can multiply the colors in the texture by a larger value so that they appear brighter. Find a “Multiply” node in the Material Expressions list and drag it into the window.
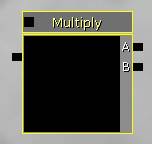
The material node (as you’d expect) multiplies two numbers together (the inputs A and B) and outputs the result on the left. What do we want for inputs? How about our texture, and that constant with a value of “2” that we created earlier?
Connect up your network as follows. You may have to rearrange the nodes (by ctrl-click-dragging them.) Once you hook everything up, you’ll see the specular highlight gets twice as bright.
You can, of course, make it even brighter by selecting the Constant node and typing in a larger number. Change the value to “5”.
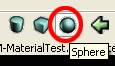
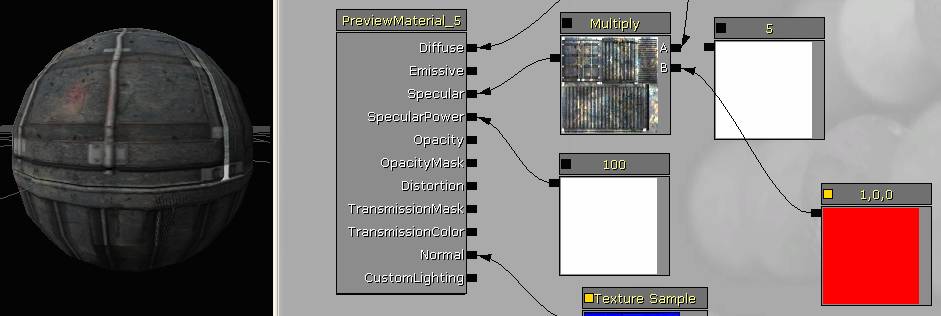
Now let’s look at one more way to change the specularity of the material. Click on the “Sphere” icon at the top of the window – this changes the preview mesh from a cube to a sphere. This will make it easier to see our changes.
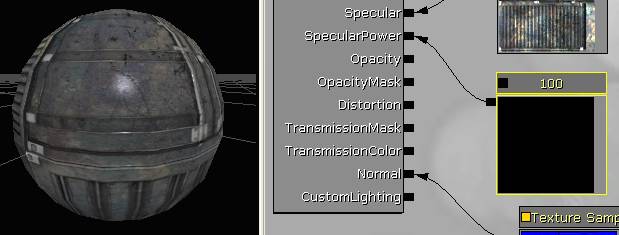
That highlight looks a little strange for metal. It’s too wide of a spot, which kind of makes it look like a soft plastic surface. We can adjust the sharpness of the highlight by plugging a constant into the Specular Power input. Create a new Constant node, give it a value of 100, and plug it into Specular Power. You’ll see the highlight gets a lot sharper, though it’s just as bright as it used to be.
Play with the number and get a sense for the effect it has. Low numbers make the highlight really wide. High numbers make it sharper. Anything less than “1” looks kind of broken.
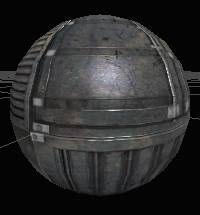
When you’re happy with the results, hit the leftmost green checkmark to apply your changes, and check out your material in the scene.
Looks better than before!
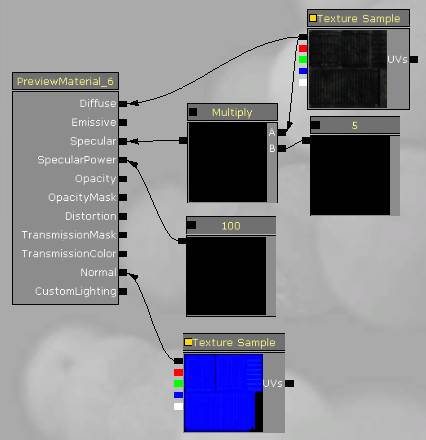
Your network should now look like this.
8) Colored specular highlight
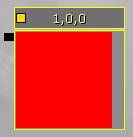
Often times, reflections in metal take on a slightly bluish tone. So let’s look at a new node type – a Constant3Vector, which is essentially a node that allows us to specify a color. Click and drag a Constant3Vector into the material editor window. While a Constant has only one value we can edit, a Constant3Vector has three values, R, G, and B (for Red, Green, and Blue.) By combining Red Green and Blue we can make any color that your monitor can display.
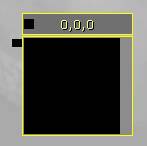
Type in a value of “1” for “R”. This will make the output of our node pure red. (You can click the little black box at the top of the node to get a realtime preview – notice the box turns yellow when the realtime preview is turned on.)
Alright, let’s hook this up to our specularity. We currently have a Constant multiplied against our texture. Let’s replace it with this Constant3Vector.
Ok, the highlight is definitely red, but it’s pretty dim again. We could add another multiply node and multiply in the constant, but instead, we can just change the “R” value of the Constant3Vector to “5” and we’ll get the same result.

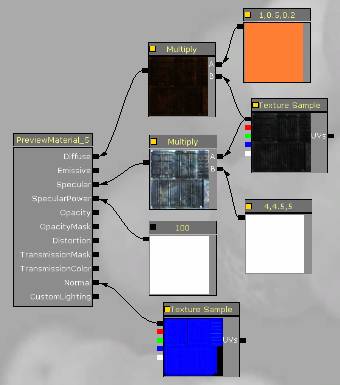
Cool! Now all we need to do is pick a number for the Constant3Vector that looks good. I found 4, 4.5, 5 looks good, but play with it yourself and come up with something you like. You can also delete that extra Constant node since we’re not using it anymore.
Here’s mine, applied to the scene.
Your network should now look like this.

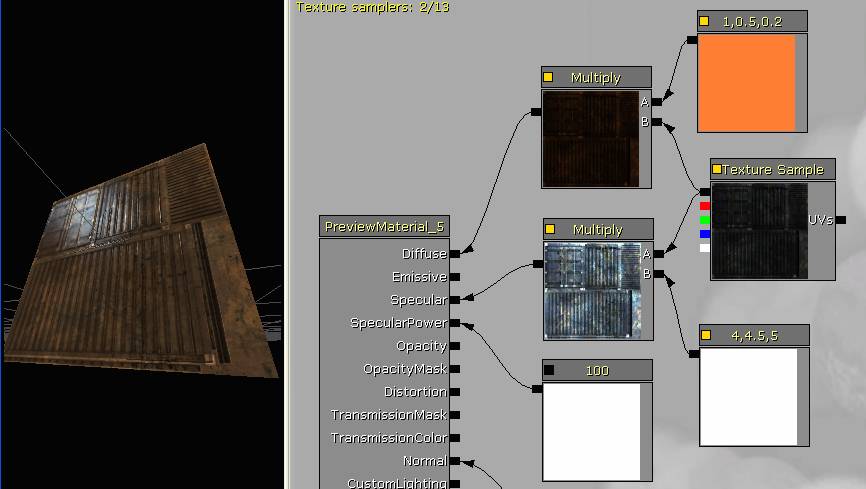
9) Tint diffuse
Let’s go through one more exercise, just to make sure you’ve got the basics. I won’t walk you through it this time, but let’s add a tint to the Diffuse color. Create a new Multiply node and a Constant3Vector node, and hook them up just like you did for the Specular color. Pick a nice rusty orange color for the tint (1, .5, .2). You should end up with something that looks like this.
10) Making your material easy to read
So the tutorial is almost over, but we’ve got one very important topic to cover – cleanup and commenting. You may be able to read your material just fine now, but when you come back in a week, or a month, an organized material with some useful comments will be a lot easier to understand.
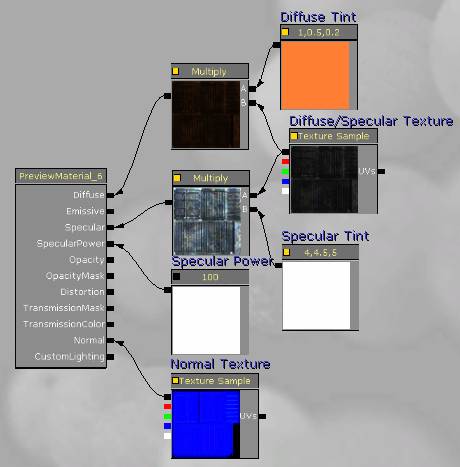
The first step is good organization. As we’ve seen, data in the Material Editor flows right to left. (The inputs of our nodes are on the right, and the spit out data to the left.) Take some time now and organize your nodes so that there’s no backtracking (the texture and constant nodes should be on the right, and the multiply nodes should be to their left). Also organize things to minimize crisscrossing lines – the nodes controlling diffuse should go on top, with the ones controlling specular below. Try to get a network that looks like this:
The next thing we can do to organize our network is to label the nodes. For instance, what if you decided at some point that you didn’t like the color of the specular highlight? It would be a lot easier to figure out what to change if that Constant3Vector node had a label on it. Select the node, and in the properties at the bottom, fill in the “Desc” field with a label for the node – “Specular Tint”.
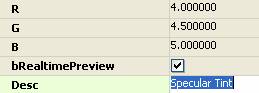
The node now has text floating over it saying what it does.

Label all of your input nodes this way. A good rule is, if it’s a node you’d want to tune at some point (like the texture inputs and constants) give it a label. If it’s just a functional node (like the Multiplies), don’t bother.
One more cool thing we can do is select a bunch of nodes and put a Comment Box around them – this groups them together in a logical way, and we can remind ourselves what a whole cluster of nodes is supposed to achieve.
This network isn’t really complex enough that comment boxes are critical, but let’s add some anyway so that you know how they work.
Select the Diffuse Tint node and the Multiply node it feeds into. (Ctrl-click to select them, or ctrl-alt-drag a selection box around them.) Press the “c” key to add a comment box.
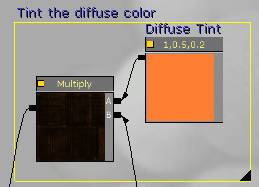
In the “Comment Text” window, add some useful text – like “Tint the Diffuse color”.

You now have a box grouping your nodes. If you drag it around, anything inside of it will be dragged along. Add another comment box labeling the Specular tint nodes, hit the green checkmark, and save your package.

Believe it or not, this is an extremely powerful node network, and in fact does more than you need to produce a full-quality asset. (Look in the HU_Deco package and open up the material named M_HU_Deco_SM_Bench01. Look familiar?)