Learning Unreal Engine 3 ¢ UE3 Editor
Lighting
This section covers lighting in Unreal.Ā Since this is just an editor tutorial, I wonÆt go into much depth on good lighting (entire books have been written on the subject!)Ā But I will talk about how UnrealÆs tools in specific can be used to achieve good effects.
1) Previewing Lighting
One of the coolest features of the Unreal editor is that you can see the effects of changing your lights in realtime.Ā This lets you work pretty effectively in a small area, tuning your lights as needed.Ā Once youÆre pretty sure the light looks how you want it, you can bake lighting and see the final optimized result.Ā Sometimes the look will change slightly, but itÆs easy enough to tweak the light again to get the look you want.
For most of these exercises weÆll place a new light and work with it in dynamic mode, then bake when weÆre all done editing.
2) Types of Light Objects
There are four basic types of light objects in Unreal ¢ Point
Lights, Spot Lights, Directional Lights, and Sky Lights.Ā
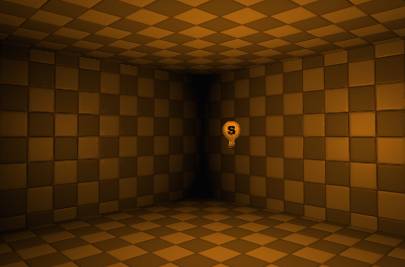
Point Lights can be thought of as a light bulb ¢ they radiate in all directions.
Spot Lights are like a flashlight, or the headlight of a car.Ā They radiate out in a cone shape in a specific direction.
Directional Lights are most like the sun ¢ they fill the entire scene with light coming from a uniform direction.
Sky Lights are kind of like the uniform gray lighting you get on a cloudy day.
All four light types have a lot of properties in common (like brightness and color), so weÆll dive into the properties of a point light first, and then just discuss whatÆs different about the others.Ā
3) Point Lights
Open an existing test map, or create one.Ā For now, weÆll start in Unlit mode.
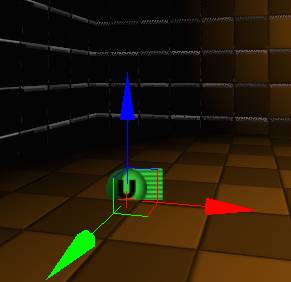
Placing a point light is easy ¢ right-click on a surface and choose Add Actor->Add Light (Point).Ā Or just hold down the ōlö key (for ōlightö) and click on a surface.Ā A point light will appear.Ā
Go into Lit mode, and press F4 to bring up the lightÆs properties, then open up the ōLightö category and the ōLightComponentö subcategory.

There are some pretty cool controls here if you know how to look for them.Ā For instance, if you want to change the Brightness of the light, you can type in a new number in place of ō1.000000ö.Ā Or, if you hold the mouse between the two black arrows on the right, youÆll see it change to a double-arrow icon.Ā Click and drag up and down and youÆll change the brightness dynamically.
Next to the LightColor field, you can click the magnifying glass to bring up a color palette display.Ā You can also click on the mouse pointer icon to get a color picker (click in the scene to sample the surfaceÆs color.)Ā Try both of those now.
IÆll list the most important properties here.Ā Be sure to try each one on your own.
Brightness ¢ pretty obvious, itÆs how bright the light appears.Ā
FalloffExponent ¢ how sharp or soft the lightÆs falloff appears within its radius.Ā Move your light close to a wall and adjust this value, and youÆll see how it works.
LightColor ¢ the color of the light.Ā Multiplies against the Brightness setting ¢ so if you pick a bright color but a low brightness, itÆll look dark in the scene.
Radius ¢ how large of an area the light affects.Ā A wireframe sphere is drawn around the light in the level to help you visualize.Ā (You can also adjust this by using the scale tool on the light in the scene.)
Other properties are generally best left at their default values, though weÆll discuss some of them later.
For now, make your light a rich orange color with a fairly high brightness and a radius large enough to fill your room.Ā Be sure to bake lighting to get the final effect.
4) Spot Lights
Placing a spotlight is a little harder than placing a point light ¢ they can be found under the Actor Classes browser.Ā So open your Generic Browser and go to the Actor Classes tab.Ā Open up the ōLightö category and select Spot Light.Ā (YouÆll notice two sub-categories, SpotLightMovable and SpotLightToggleable.Ā These are mainly used in animation sequences or hooked up to gameplay, so ignore them for now.)
Right-click in your scene and select ōAdd SpotLight Hereö.Ā A white spotlight appears pointing down.Ā Move it so that itÆs casting a circle of light on the ground.
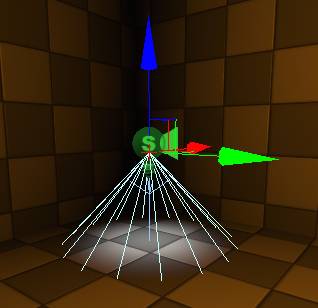
Spotlights have all of the same important properties as point lights (color, brightness, radius, falloff) but they have a few additional properties as well.Ā Make sure your spotlight is selected and open up its properties.Ā Look for two new properties.
OuterConeAngle ¢ how wide of an angle the cone covers.Ā
InnerConeAngle ¢ controls the hotspot in the middle of the cone.Ā If itÆs 0, itÆll cast a very soft circle of light.Ā If this is the same radius as the OuterConeAngle, the spotlight will cast a hard-edged circle of light.Ā (But you may lose detail when you bake lighting.)
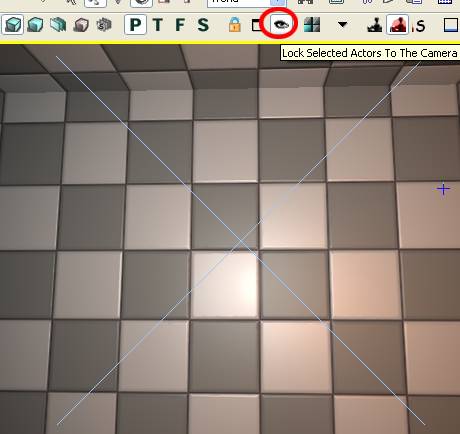
You can rotate a spotlight using the standard rotation tool in the editor.Ā You can also control it in first-person mode (like holding a flashlight) by clicking on ōLock Selected Actors To The Cameraö on top of your perspective viewport.
Update your spotlightÆs cone angle to cover a wider area, and point it at a wall.Ā Bake lighting to see the final effect.
5) Directional Lights
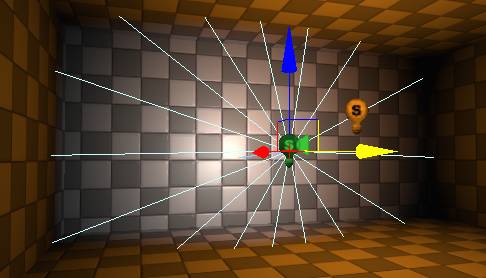
As I mentioned before, a directional light is like the sun.Ā So whatÆs going to happen if I place one in this room?Ā After all, there are no windows.Ā Place a directional light now (the same way you paced a spot light ¢ select it under the Actor Classes browser.)
It doesnÆt really seem to be affecting the scene, except for a weird shimmering effect on the walls.Ā And if you bake lighting or rotate the light, the shimmering goes away.Ā
Aha!Ā Even though the icon for the light is inside the room, the light is only affecting the outside of the level.Ā Much like the sun, the walls of the rooms are casting a shadow on the interior of the rooms.Ā So a directional light is really only useful in an outdoor scene.Ā (And even then, you have to turn off ōCast Shadowsö on any skydome object youÆve placed.)Ā Rotate the light slightly so that itÆs not facing straight down.
Rotating a directional light works the same way as rotating a spot light.Ā But instead of having a light cone to indicate the direction, youÆve got a little blue arrow.Ā Works well enough!

6) Sky Lights
Skylights are a good way to add a small amount of ambient light to your level.Ā TheyÆre also great during the prototyping phase, since they cast light on everything in the scene and they donÆt slow down your framerate much.Ā Their big disadvantage is that they donÆt cast shadows ¢ so even interiors will receive light from a skylight.Ā
LetÆs place one now (same method as the other light types.)
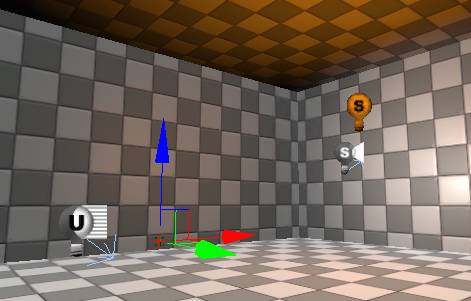
Immediately the scene gets much brighter (except for the ceiling, which is unaffected.)Ā The light is brightening up every surface based on the angle relative to ōupö.Ā (So the floor gets a lot of light, walls get a medium amount of light, and the ceiling gets no light.)Ā We can adjust the brightness and color of this light, and in fact we can add in ōbounceö light that affects the ceiling as well.Ā Open up the properties for your skylight now, and play with the settings.Ā There are only two new ones you havenÆt seen yet.
LowerBrightness ¢ the brightness of the ōunderö light (default to 0)
LowerColor ¢ the color of the ōunderö light.
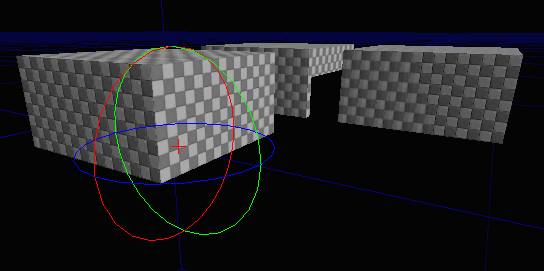
Adjust the skylightÆs properties so that the color from above is bright red, and the color from below is bright blue (with a bright enough LowerBrightness that itÆs visible.)
Ok, thatÆs pretty hideous, but notice how the red and the blue are combining to make a purple color on the walls.Ā It should be especially obvious if you delete your point light.

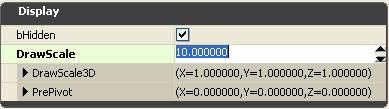
One last thing ¢ the icon for that skylight is very small, and itÆs likely to get lost in a large level.Ā In the properties, under the Display category, change the DrawScale to 10.Ā ItÆs much easier to find now.
7) Putting it all together
LetÆs look at how these different light types are actually used in a scene.
IÆve stripped out a small section of one of the Unreal Tournament 3 levels (DM-RisingSun) so that you can see how Epic used these light types in a practical setting.Ā Download this file and unzip it to My Documents\My Games\Unreal Tournament 3\UTGame\Unpublished\CookedPC\CustomMaps
http://waylon-art.com/LearningUnreal/DM-LightingTest.zip
Load up the map, and you should see something that looks like this:
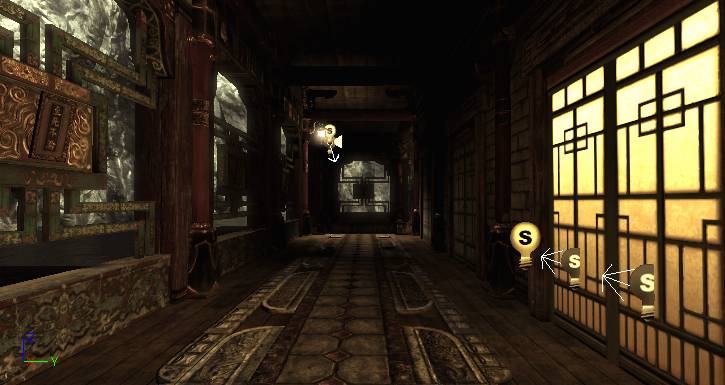
Look around in the scene and see if you can get a sense for what lights affect what.Ā There are a bunch of point lights and spotlights placed near light fixtures and that glowing door.Ā But whatÆs lighting up the cliffs in the background?Ā LetÆs find out.
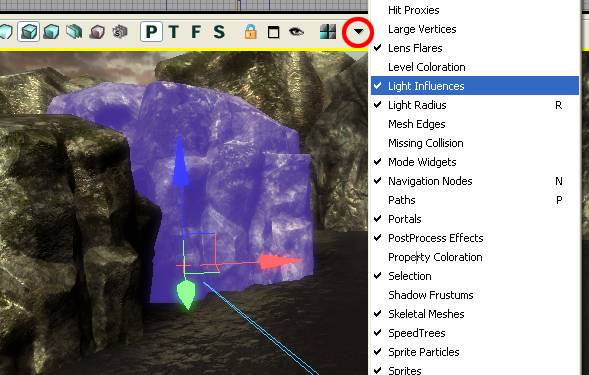
Click on the ōToggle Show Flagsö button and turn on ōLight Influencesö.Ā Select a cliff mesh and youÆll see two blue lines coming out of it.ĀĀĀ
If you zoom out, you can see that the lines lead to the two directional lights in the scene.
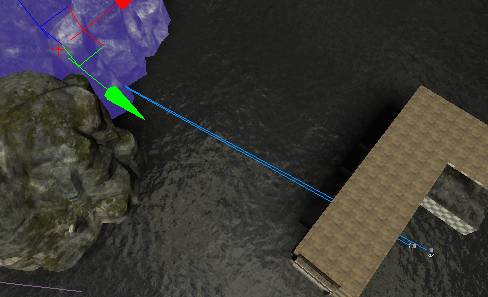
You can see that the lights point in roughly opposite directions.Ā And if you bring up the properties youÆll get a sense for what they do for the scene.Ā One has a brightness of 2.5 and sort of an off yellow color ¢ that acts as the sun.Ā The otherÆs brightness is 0.25 and is a dull blue color ¢ that functions as the fill from the sky.Ā If you deleted all of the lights in the level except for these two, the exterior spaces would still look pretty good.
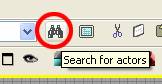
8) The Search for Actors tool
You can select lights in the 2D or perspective views to figure out what they do, but letÆs look at a new tool ¢ the ōSearch for Actorsö tool.Ā You can open it up by clicking on the binoculars icon at the top of the window ¢ do that now.
The Search for Actors window opens up, listing all brushes, static meshes, lights, and other objects in the world.Ā But we just want to look at lights.Ā Click on the ōContainingö radio button, then in the ōSearch Forö field, type ōlightö.Ā The bottom of the display should say ō11 objects foundö.Ā
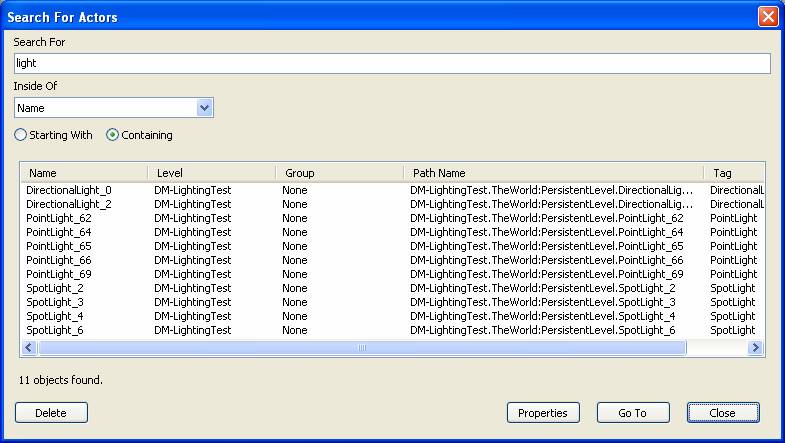
So what do we have?Ā Two directional lights, five point lights, and four spotlights.Ā Notice there arenÆt any skylights in the scene.Ā If you double-click on a light in the list, it highlights it in the scene and focuses the camera on it.Ā
Spend a few minutes and look at the properties of each of the lights, and get a sense for what role each one fills in the scene.
9) The PostProcess volume
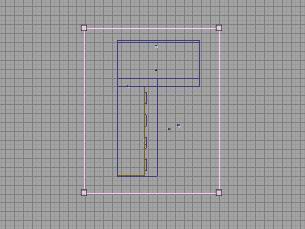
ThereÆs one last thing thatÆs affecting the look of the lighting in the level.Ā ThereÆs a PostProcess volume surrounding the corridor.Ā If you zoom the camera out in the perspective view, youÆll notice a subtle change in the colors of the scene.Ā A postprocess volume controls tinting, brightness, and a bunch of other effects as long as the camera is inside of it.
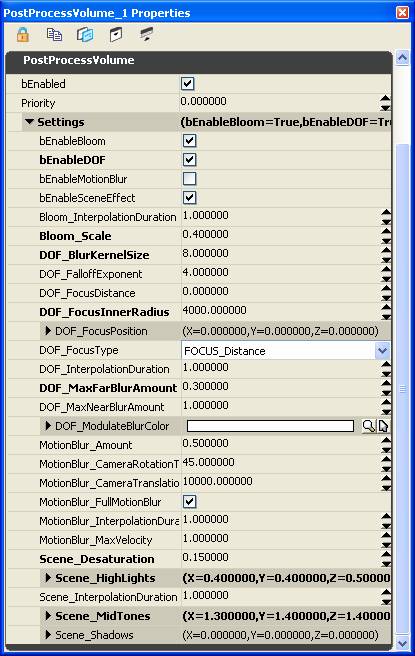
Select the postprocess volume now and open up its properties.Ā (It shows up as a purple box in the 2D views, or you can search for ōpostö in the Search for Actors tool.)
WeÆll go into more detail in a later tutorial, but try playing with some of the settings and see what affect they have.Ā The controls arenÆt very intuitive, but the color tinting comes from the Scene_Desaturation, Scene_Highlights, and Scene_MidTones parameters.
10) Lighting Channels
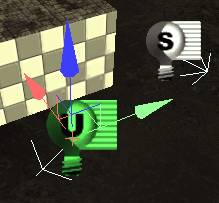
You may have noticed that the directional lights have slightly different icons ¢ one has a ōUö on it, the other has an ōSö.Ā (The one colored like the sun is the ōUö.)Ā If you compare the properties of the two, and look under the ōLightingChannelsö category, youÆll see that the sun has the ōDynamicö flag checked while the blue light doesnÆt.Ā Both of them have BSP and Static checked, which means theyÆll affect BSP (CSG) surfaces and Static meshes.Ā But what do the other flags mean?Ā What does CompositeDynamic affect, and what does Dynamic affect?Ā
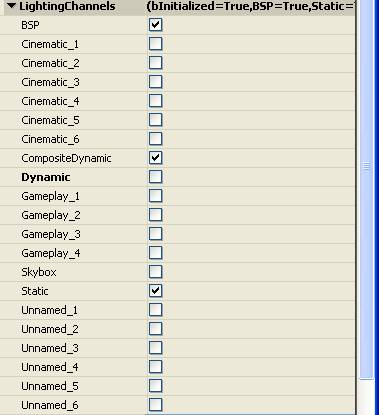
CompositeDynamic just means that the light affects characters.Ā (Yeah, not the most intuitive, but the name is based on the technology that drives character lighting.)Ā
Dynamic is sort of a special flag ¢ itÆs the most expensive type of lighting, and in the case of DM-RisingSun, itÆs used on the door that opens up as a part of the scripted opening sequence of the game.Ā Because the door moves, it canÆt use static lighting, so itÆs tagged so that only certain (dynamic) lights affect it.Ā
There are lots of other flags though, and youÆre free to use these as you need.Ā For instance ¢ say you wanted a spotlight to affect a floor, but not the walls next to it.Ā You could set up the spotlight so that only ōUnnamed_1ö is checked, then make sure ōUnnamed_1ö is also checked in the properties of that floor mesh.Ā
Knowing how to manipulate light channels isnÆt critical, but in special circumstances they give you that little bit of extra control you might need.
11) Pickup Lights
Pickup lights are a special gameplay construct handled automatically by the tools.Ā TheyÆre covered in the ōAdding Gameplayö section.
http://waylon-art.com/LearningUnreal/UE3-04-AddingGameplay.htm
12) Lighting a scene
Now that youÆve seen how Epic lights one of their scenes, a good exercise would be to delete their lights and re-light the scene on your own.Ā So try that now.Ā (You can select all of the lights and delete them via the Search for Actors dialog.)Ā You donÆt necessarily need to duplicate EpicÆs scene exactly ¢ be a little creative, and see if you can take things in a different direction.Ā Be sure to bake often, since the look changes quite a bit when you bake.
To get you started, here are some of the ōrolesö a light can fill in your scene.
Directional Lights
- The Sun
- Ambient sky light (try placing multiple lights, all with a low brightness and bluish color, facing downward in the four cardinal directions)
Point Lights
- Area lights (dim, filling a corridor with bounce light)
- Highlights (small radius, probably near the spotlight meshes.)
- Bounce lights (if a bright light hits the floor, itÆll bounce up and light up the walls and ceiling a little too)
Spotlights
- Spotlights (a cone of light projecting from a spotlight mesh.)
- Fill lights (blue light pouring in between the arches, hitting mostly the floor)
- Bounce lights (similar to point lights, but a little more control)
Skylights
- You may want to add some additional ambient light to the scene using a skylight.
Postprocess Volumes
- If you leave the existing postprocess volume in place, itÆll tint your scene slightly with a warm color.Ā Try playing with the values to change the look.
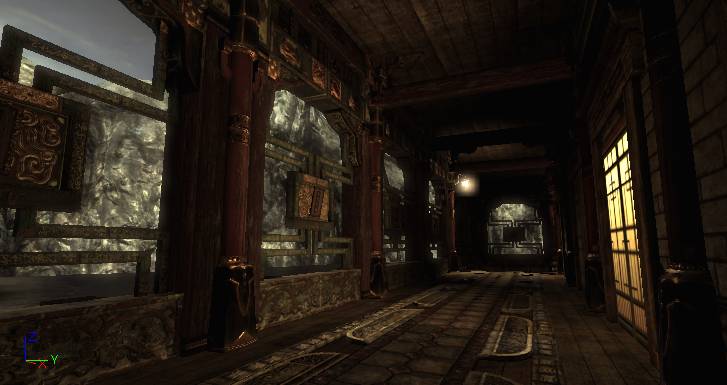
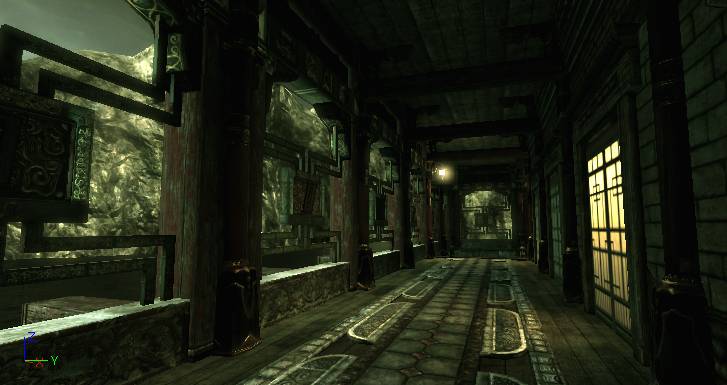
You can see in my before & after screenshots below, most of the difference comes in the postprocess effects, but IÆve got a lot more light spilling in from outside and a lot less being cast from the interior light sources.Ā
13) Reducing bake times / saving memory
ItÆs important to keep your map as small as possible.Ā ThereÆs a direct correlation between map size and how many people download it.Ā Overly-high lightmap resolution is a major contributor to map size, and it also causes your map to take longer to bake.Ā So kill two birds with one stone, and optimize your lightmaps.
- Optimize hidden BSP surfaces.Ā Set the resolution to 65536, and uncheck ōAccepts Lightsö, ōAccepts Dynamic Lightsö, and ōForce Lightmapö.Ā Also apply the material ōRemoveSurfaceMaterialö from the EngineMaterials package.
- Reduce lightmap resolution on surfaces that donÆt need it.Ā If a surface has a sharp shadow across it itÆs ok to leave the resolution high, but lots of surfaces that donÆt receive direct lighting look fine with a resolution of 64, 128, or even higher.
- If you assign lightmaps to static meshes, keep their resolution low.
- If possible, assign low-res lightmaps to static meshes that have a high polygon count.Ā (Lightmaps may be cheaper than calculating lighting for every vertex.)Ā More information can be found here: http://forums.epicgames.com/showthread.php?t=589900